


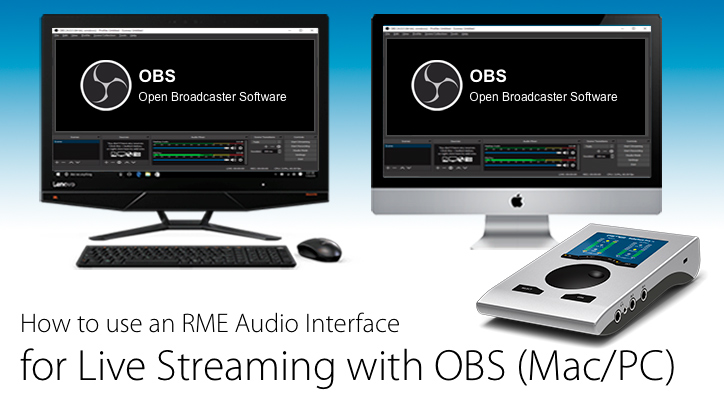
 How to set up for live streaming with an RME audio interface and OBS (Open Broadcaster Software)
Live streaming is a great way for musicians to connect with fans worldwide, and with the majority of us quickly having to adapt to working from home, there’s never been a better time to try out YouTube and Facebook’s Live options, or dedicated streaming platforms like Twitch.
Whether you’re planning to perform live from your home or studio setup, or you’d like to showcase your production methods by breaking down one of your tracks, streaming gives you the opportunity to interact with your fans from around the world, live and in real-time.
Having previously covered using Skype and Zoom for audio collaboration, we thought we’d take a look at how you can use your RME audio interface for live streaming with the popular open-source software OBS (Open Broadcaster Software).
The steps for setting up differ slightly whether you’re a Mac or Windows user, so check out the respective videos below.
We’ve also outlined the steps in text format and thrown in a few additional tips you might find useful, including a bonus video on how to use your DAW with OBS, and how to use sidechain compression for a nice professional touch when you’re streaming.
To jump to the Mac tutorial, click here.
To jump to the Windows tutorial, click here.
To jump to the Live streaming with a DAW video, click here.
Video – How to use OBS with an RME Audio Interface (Mac OS X)
See more videos at Synthax TV
 Mac OS X – How to use OBS with an RME Audio Interface
1 – Download and install Existential Audio’s Blackhole, a free virtual audio driver for Mac OS X that allows audio to be passed from one application to another.
2 – Download and install the Ladiocast app. Ladiocast is another free application, that provides a nice, simple interface for routing audio (complete with metering and level control).
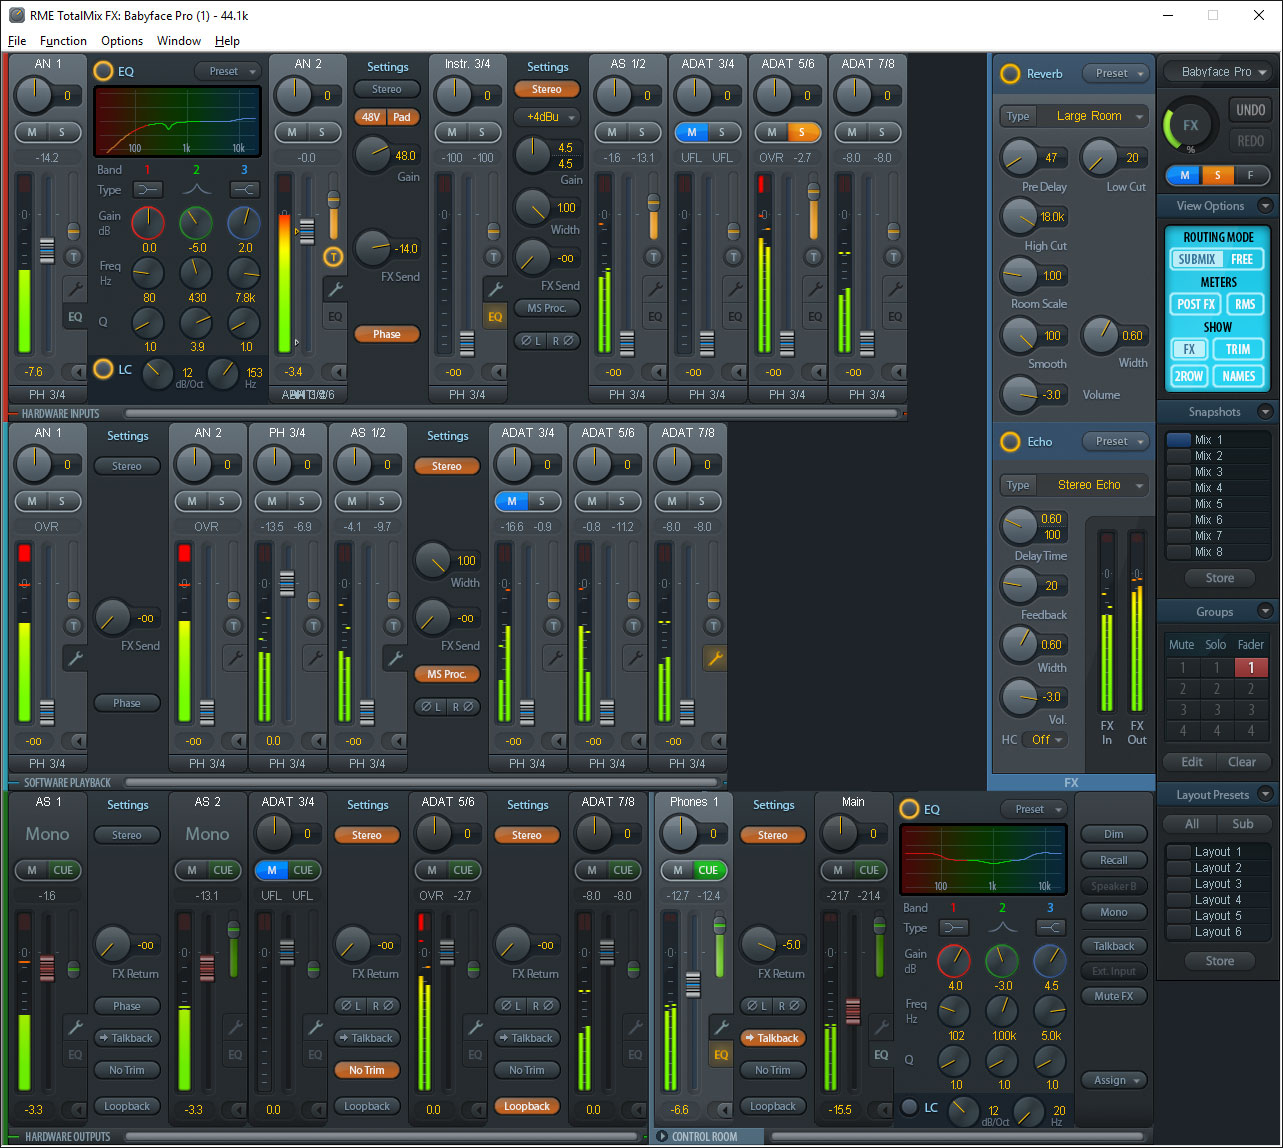
3 – Having installed both apps, we’re now going to use TotalMix FX’s Loopback function to route all of the audio routed to an output channel, back in to its corresponding input channel.
4 – Open TotalMix FX and click on an output you’re not currently using to select it (e.g. ADAT 3/4, bottom-row of TotalMix).
5 – Now raise the faders of any input channels (top-row of TotalMix) you want to send to OBS – microphones, instruments etc.
6 – Click the wrench symbol on your output channel (ADAT 3/4 in our example), and activate the Loopback button. This sends any audio you have routed to this output back in to its input channel – in this case it’s the input channel labelled ADAT 3/4 in the top-row of TotalMix.
Note: You won’t actually see any signal on this input channel in TotalMix, as the input level remains reserved for any audio coming in on the physical input connection.
7 – Open Ladiocast and select your audio interface for Input 1 (top-left). Now use the arrows to select the input you’re using for Loopback.
The easiest way to do this, is to count the channels in TotalMix from left to right. For us, ADAT 3/4 is the fourth stereo pair along the top-row of TotalMix, therefore we want to select channels 7/8 in Ladiocast.
8 – For your output in Ladiocast, choose Blackhole.
9 – Open up OBS and choose Settings (or Preferences), then click on the Audio tab.
10 – The Devices section lists your audio inputs for OBS. Click the third option (Mic/Auxillary Audio), and set it to BlackHole 16ch, then click OK.
11 – You now have an input channel and level control in OBS for your Loopback submix. Any audio you send to this Output (in TotalMix FX), will be audible for your audience during your live stream.
12 – You should now be set up to live stream with OBS!
Scroll down for some additional tips on live streaming, including how to monitor from OBS, and how to use your DAW as part of your live stream.
See the full range of RME Audio Interfaces
Video – How to use OBS with an RME Audio Interface (Windows)
See more videos at Synthax TV
How to use OBS with an RME Audio Interface (Windows)
1 – Open your Windows Sound Settings and select which output channels you would like your computer to use as the default output.
2 – You should be able to choose from any of your I/O, but if you can’t see the inputs and outputs you’d like to use in the Sound Settings, you may need to add each set of I/O as a WDM device. To do so, open the RME Settings (the icon is the RME logo ‘on fire’), then click on the ‘Configure…’ button (next to the header ‘WDM Devices’).
3 – Here you can put a check next to which sets of inputs/outputs you would like to be visible to your Windows machine.
4 – Open OBS, click on the Settings button and go to the Audio tab.
5 – Select your preferred Desktop Audio Device (in our case MADI 3+4).
6 – Under the first Mic/Auxillary Audio Device, choose your microphone channel (Analog 1+2 in our example), to give yourself an input for your microphone.*
* OBS’s input channels are stereo by default. To set your mic input to mono, see the section below.
7 – We’re also going to use the second Mic/Auxillary Audio Device option, and choose MADI 7+8. This is the channel we’re going to route our DAW to for sharing a music project with our audience, giving it its own dedicated channel and level control in OBS.
8 – Click OK.
9 – We now have two dedicated input channels in OBS – one for our microphone, and one for all other sounds on our Windows machine.
10 – You should now be set up to live stream with OBS!
Scroll down for some additional tips on streaming including how to monitor from OBS, and how to use your DAW as part of your live stream setup.
Video – How to use your DAW with OBS (and add Sidechain Compression)
See more videos at Synthax TV
How to route your DAW into OBS
On Mac
1 – Open your DAW and set its output to be something other than AN 1/2 (e.g. AN 3/4). This is to give it its own Software Playback channel in TotalMix FX (middle-row), which doesn’t clash with the OBS output (which will be AN 1/2 by default).
2 – Now in TotalMix FX, click on the audio output you are using for Loopback to select its submix (ADAT 3/4 in our example, bottom-row of TotalMix).
3 – Now raise your DAW’s fader to route its audio to your Loopback channel, so that its audible in OBS.
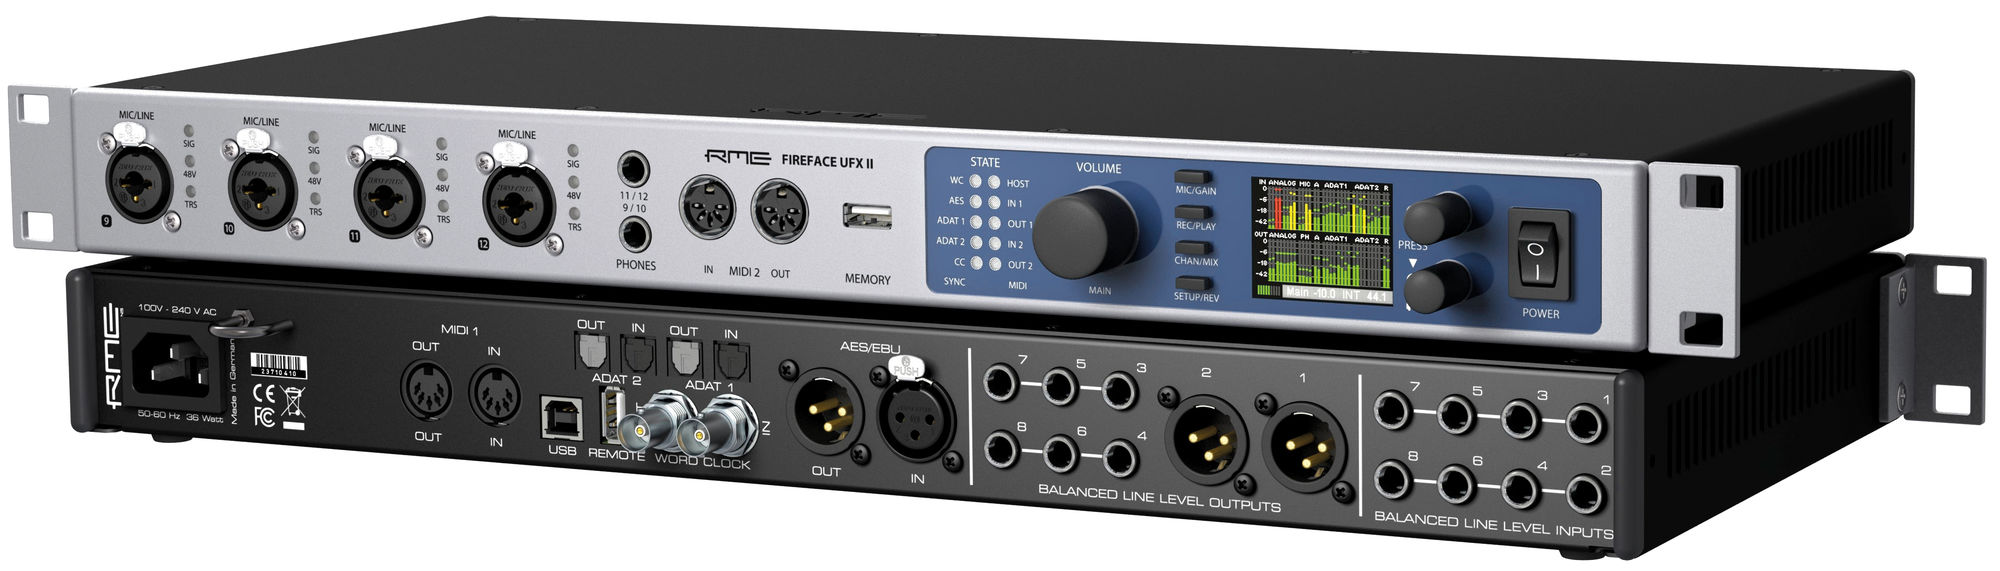
The RME Fireface UFX II is a 60-Channel audio interface for use with both Mac and Windows systems.
On Windows
1 – In order for our DAW to send audio to OBS, we need to use TotalMix FX’s Loopback function. This sends any audio we route to our chosen output (MADI 7+8 in our video), back in to its corresponding input.
2 – Open OBS and click on Settings, then the Audio tab.
3 – Under Mic/Auxiliary Audio 2, choose a pair of outputs you aren’t currently using on your RME interface.
4 – Open TotalMix FX and click on the fader of the output you chose in OBS to select its submix (bottom-row). Click the wrench to expand the options, and activate the Loopback button.
5 – Now raise the fader that your DAW is outputting to (middle-row of TotalMix), to route its audio to this output.
6 – You should now also see level in OBS for your DAW input. You can also rename this channel in OBS to make it easier to idenitfy which channel is which.
 How to monitor from OBS
On Mac
1 – Open OBS and click on the Settings Cog next to your audio input fader, then select Advanced Audio Properties.
2 – In the window that opens up, use the Audio Monitoring drop-down box to select Monitor and Output.
3 – This will now allow you to monitor directly from OBS, which will output audio to the first channel in the Software Playback row in TotalMix FX (AN 1/2, middle-row).
4 – If you don’t see any signal in TotalMix FX, check you have your audio interface selected in OBS, by clicking on Settings, then the Audio tab. Scroll down to the section labelled ‘Advanced’, and make select your interface as your Monitoring Device.
4 – The combination of LadioCast > Blackhole > OBS will likely introduce a fair amount of latency however.
5 – We’d therefore recommend using this channel to set a level you’re happy with in OBS before you begin your stream, and then use TotalMix FX for a (zero-latency) monitor mix when you go live.
On Windows
1 – Open OBS and click on Settings, then click on the Advanced tab.
Note: On some versions of OBS, you may need to go to the ‘Audio’ tab instead.
2 – Under the Audio section of the Advanced tab, select an Audio Monitoring Device. We’ve chosen to use MADI 5+6, to give OBS its own dedicated Software Playback channel in TotalMix FX (middle-row).
3 – Next, click on any of the Settings Cog icons next to your three audio channels in OBS, and choose Advanced Audio Properties.
4 – For each channel you want to monitor in TotalMix, click the Audio Monitoring drop-down and select Monitor and Output.
5 – Finally, open TotalMix FX and click on the output you’re using for monitoring (e.g. your headphones output, bottom-row of TotalMix), then raise the fader on OBS’s output channel (middle-wor of TotalMix) to route it to your headphones. We can now hear all of the audio directly from OBS.
6 – This method will probably introduce some latency however, so we’d recommend only using the OBS output channel for adjusting your levels before you stream.
7 – Once you’re happy with your levels and are ready to stream live, you can then use TotalMix to route your microphone, DAW and desktop sounds straight to your headphones, to give yourself a zero-latency monitor mix.
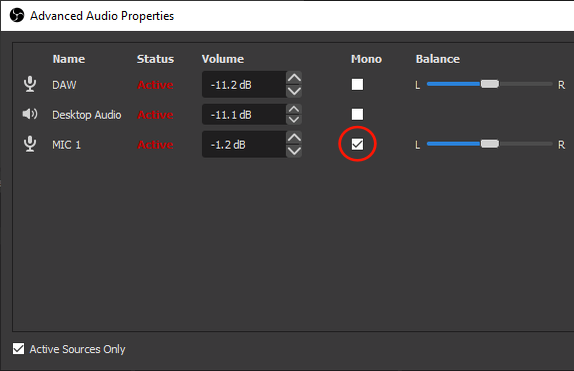
Setting your microphone input to Mono in OBS
Input channels in OBS are set to stereo by default, so on Windows you may find your microphone will only be heard on the right or left channel.
1 – To correct this, click the Settings Cog next to your microphone channel in OBS, and select Advanced Audio Properties.
2 – Activate the ‘Downmix to Mono’ check-box for your microphone channel.
3 – Audio from your microphone will now play back in both left and right channels.
Adding a Limiter plugin to your OBS output
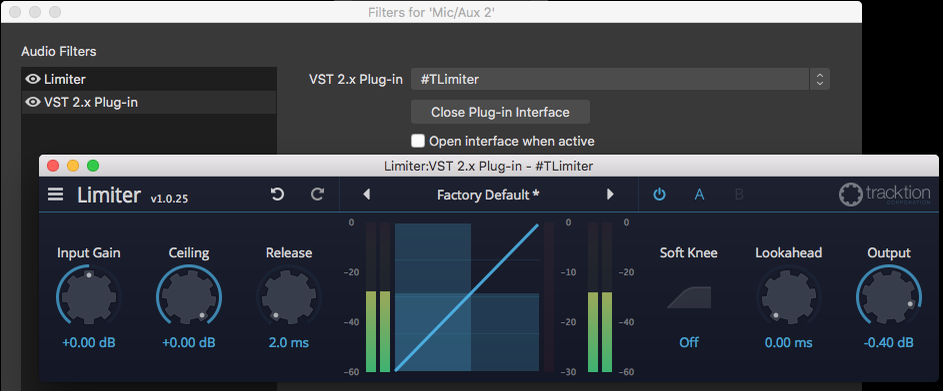
Another tip is to add a Limiter to your OBS input, to make sure you never accidentally play too loud during a stream.
1 – To add effects to your input channel, click on the Settings Cog again and choose ‘Filters’.
2 – OBS supports VST plugins, so you can add your favourite Limiter plugin.
(Try setting your Limiter’s output to -0.40dB, a commonly recommended level for catching any rogue peaks.)
3 – To add a VST, click on the + symbol and choose the ‘VST 2.x Plug-In option’. You can then choose from all of your installed VSTs via the drop-down, and click the ‘Open Plug-In Interface’ button to make changes.
Mirroring your headphone mix in TotalMix FX
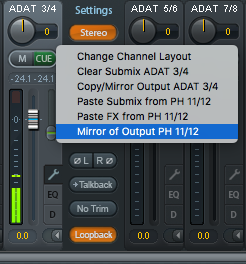
TotalMix FX’s ‘Mirror’ function allows you to pair output submixes together, so that any changes you make to one will be mirrored by another. This means if you want to adjust the level of your guitar for example, the volume change will be applied for your audience as well.
1 – Right-click on your monitor output (e.g. your headphone mix), then choose the Copy/Mirror Output option.
2 – Now, right-click on your Loopback channel (ADAT 3 / 4 in our example), and choose the Mirror of Output option.
3 – Now, any changes you make to the input levels in your headphone mix will also occur in your Loopback channel (and thus also for your audience).
Create and Save a custom TotalMix FX template
Once you’re happy with how everything is set up, one final tip is to rename each of your channels, and hide any that you’re not using from view. You can then save this TotalMix FX setup as a workstation, which you can load any time before you stream.
1 – To rename a channel, simply double-click on its current name and type in a new one. Make sure you don’t have the ‘Names’ button activated (in the light-blue section on the right-hand side of TotalMix), as this is used to show the defaults.
2 – Once you’ve renamed your channels, click on Options from the File menu, and choose Channel Layout…
3 – From here you can choose to hide any channels you’re not using – simply select each one (use ctrl or shift-click to select multiples) and check the ‘Hide Channel in Mixer/Matrix’ box on the right-hand side.
4 – You can do this for all three rows in TotalMix – Inputs, Playbacks and Outputs.
5 – Finally, go to File > Save Workspace As and save your new custom TotalMix window for easy recall.
Final Word
We hope you’ve enjoyed this introduction to using an RME audio interface with OBS – hopefully you now have a good understanding of how to set up your audio for professional, high-quality live streaming!
If you found the info useful, please help us to grow on YouTube channel by subscribing to our channel, and let us know in the comments any other RME and pro audio-related topics you’d like us to cover.
 Free 5 Year Warranty on all RME Devices (UK Only)
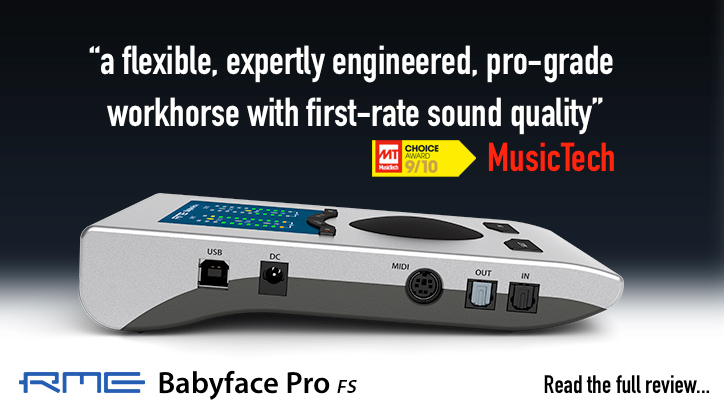
Over the past 20 years, the word ‘reliability’ has become synonymous with the RME Audio brand, thanks to both the exceptional build quality, and the industry-renowned, rock-solid drivers.
For this reason, we are happy to offer all of our UK customers a complimentary 5 year warranty on all RME products, when purchased either from ourselves, or from one of our authorised UK dealers, and remain the only interface manufacturer to offer this at no extra cost.
To activate your 5 year warranty, simply register your RME device with us within 30 days of purchase via our warranty page.
See the full range of RME Audio Interfaces
![]() If you’d like to know more about any of RME’s audio interfaces, soundcards, AD/DA Converters or microphone preamps, give us a call on 01727 821 870 to speak to one of our team or to arrange a demo.
If you’d like to know more about any of RME’s audio interfaces, soundcards, AD/DA Converters or microphone preamps, give us a call on 01727 821 870 to speak to one of our team or to arrange a demo.
You can also contact us here.