


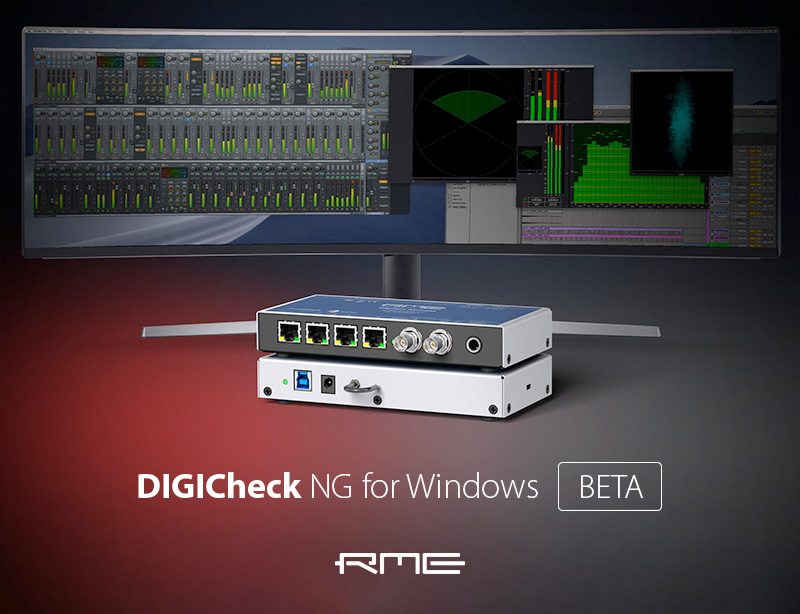
 A beta of RME’s ‘Next Generation’ suite of analysis tools is now available for Windows.
RME has announced the release of a beta version of DIGICheck NG (Next Generation) for Windows, a free suite of professional audio analysis tools available to all users of RME audio interfaces and sound cards.
Originally developed for the new M1 Macs, the benefits of DIGICheck NG can now be enjoyed by PC users as well, with RME’s developers managing to succesfully create a Windows port that meets their high and exacting standards.
RME’s Head of Design Matthias Carstens says “The constantly changing Mac OS (first to OS X, now macOS) made it necessary to re-program the whole application.
“That allowed us to use the latest tools of the OS to teleport DIGICheck into the 21st century – with updated, much more modern graphics, full scalability, even better performance, a new concept with multiple instruments in one window, new meters and functions…
“DC NG has become so good that DIGICheck on Windows looks and feels quite outdated. Therefore we are very pleased to present a fully working version of DigiCheck NG for Windows! It is based on the same code as DC NG for Mac, being in most ways identical in features and functions.”
Both DIGICheck and DIGICheck NG can run at the same time, so you can test out and compare the new version for yourself alongside the original:
Download the DIGICheck NG for Windows beta (v0.61)
For more information and to join to discussion, visit the RME forum post here, or scroll down for some tips on installing and using DIGICheck NG with your RME device.
What is DIGICheck?
DIGICheck is a free suite of analysis tools available to all users of RME audio interfaces and sound cards.
Something of a hidden gem, DIGICheck provides high quality tools for mixing and mastering applications such as multi-channel level metering (with Peak and RMS measurement), phase correlation, frequency analysis and more.
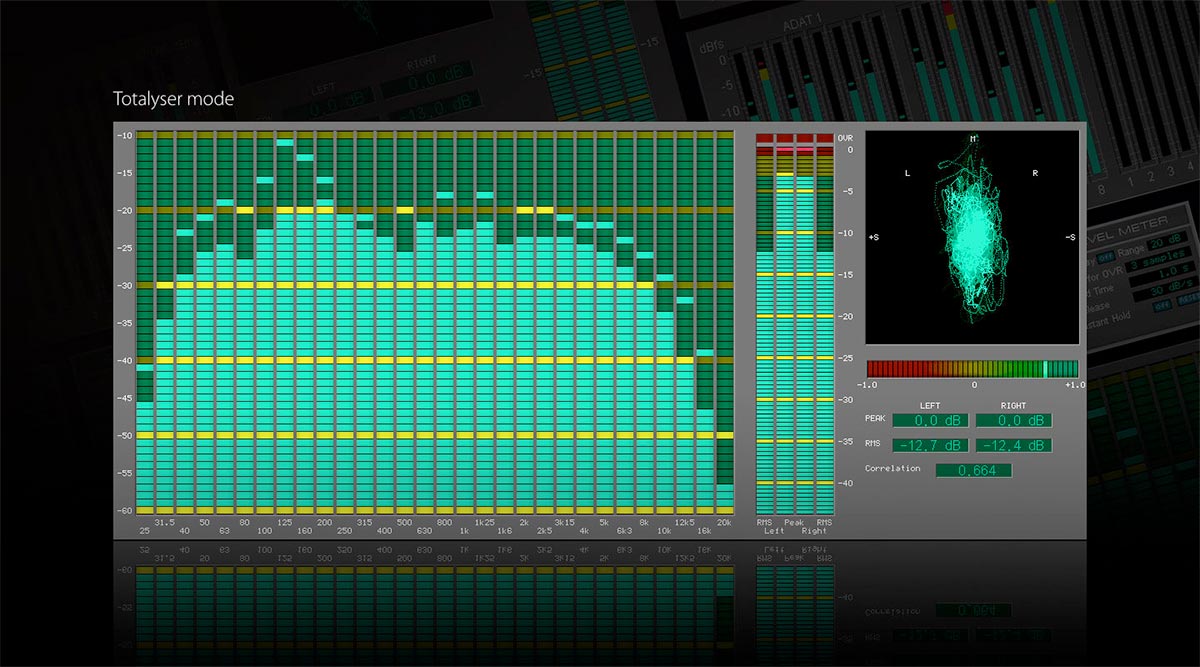
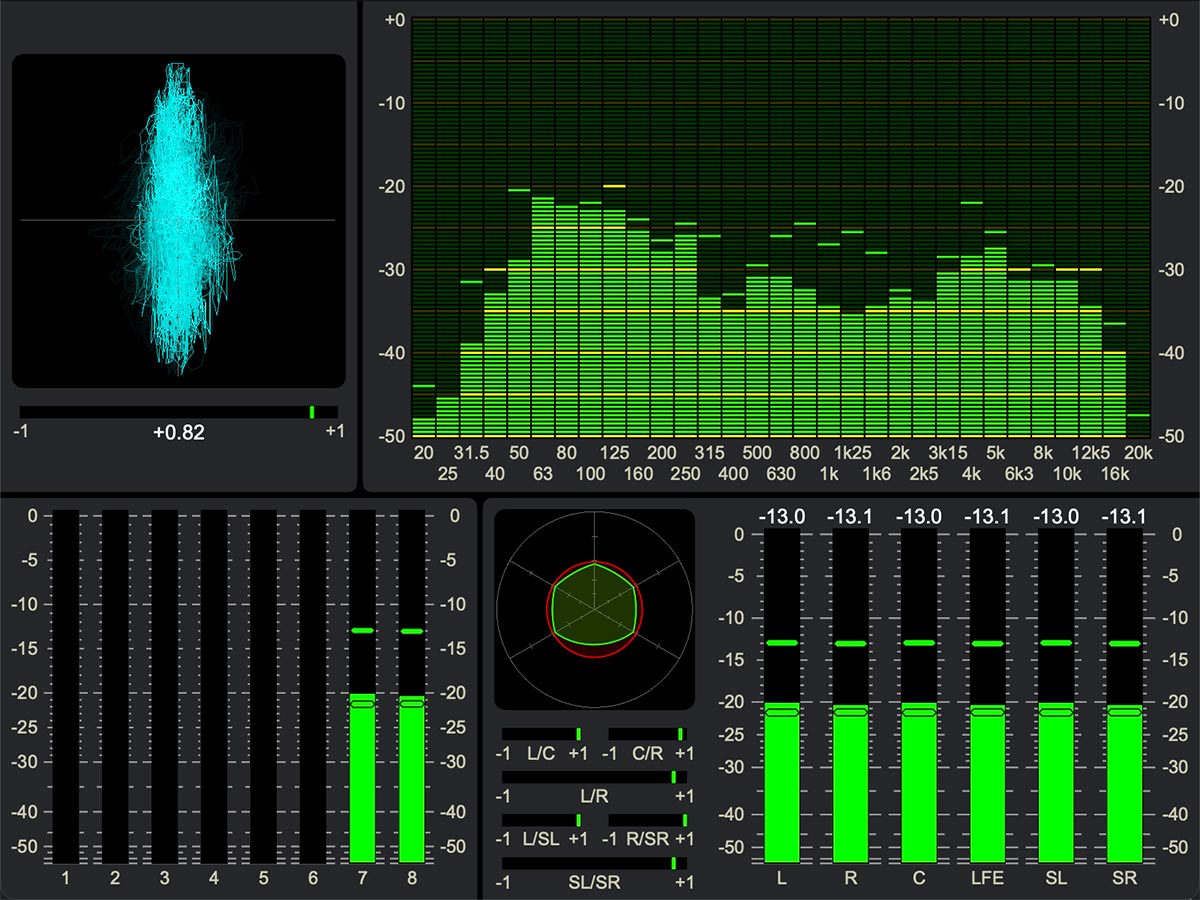
The original RME DIGICheck Totalyser
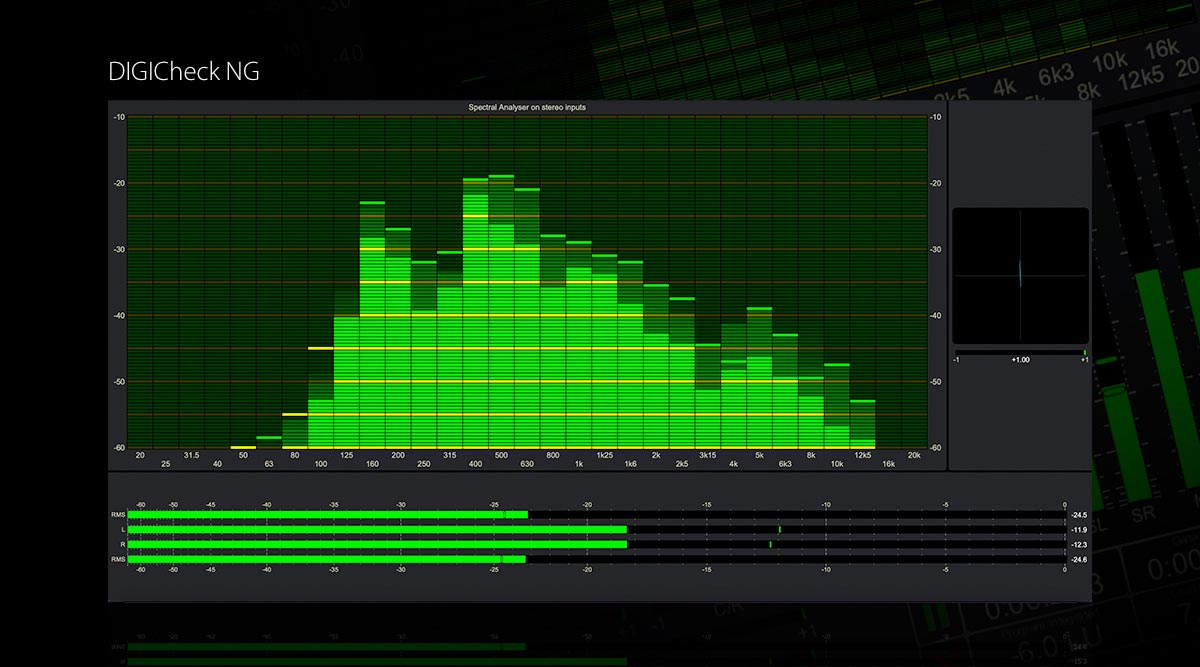
The updated modular RME DIGICheck NG
What’s new in DIGICheck NG?
Whilst the original version of DIGICheck was based around a fixed set of tools, DIGICheck NG has been redesigned with a modular approach to the layout window, allowing users to pick and choose which modules they’d like to display at any one time, and arrange them into different layouts.
DIGICheck NG Overview on macOS
Using DIGICheck on a Mac requires the use of TotalMix’s FX Loopback feature. On Windows, simply select which output from the settings window you would like to use for analysis (more info below).
 How to use DIGICheck NG
1 – Download, unzip and install the DIGICheck NG for Windows Beta (Download Link).
2 – Upon opening DIGICheck NG you’ll find the default layout, which consists of 4 resizable tools referred to as ‘instruments’.
Currently, up to 4 instruments can be displayed simultaneously in various configurations, although RME states they are investigating increasing this number with a future update.
You can also create additional windows for other tools by going to File > New Window.
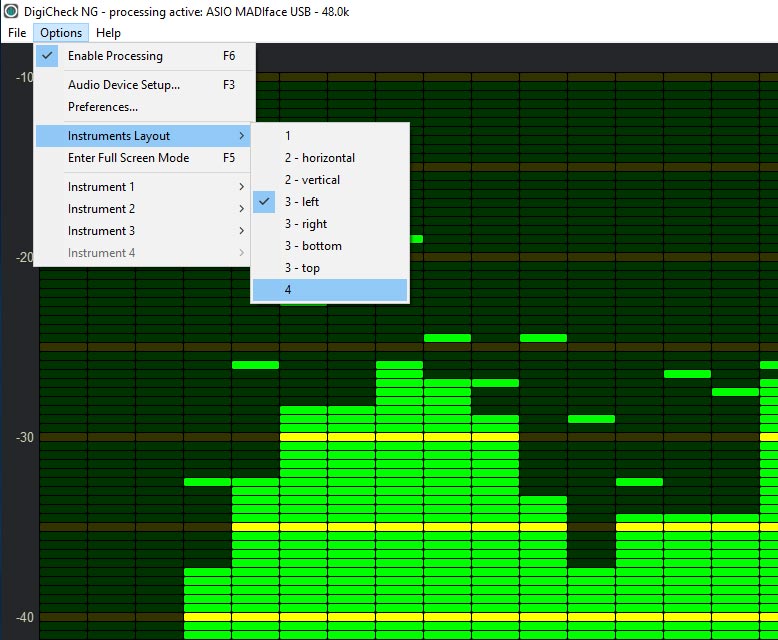 How to change the Layout
1 – To change the Layout of DIGICheck NG, go to Options > Instrument Layout and select from any of the layout options. The number refers to the number of modules (1, 2, 3 or 4), whilst the directions (left, right etc) refer to how the instruments will be laid out on your screen.
2 – Click and hold on the edge of an instrument to resize it. You can also left-click and hold on an instrument, then drag and drop it to another area to re-arrange the order.
How to select a Tool / Instrument
1 – Once you’ve chosen a layout, right-click on any of the instruments and go to Type Selection > to select any of the tools, for example the spectral analyser.
Alternatively, you can also go to Options > Instrument 1 > Type Selection etc via the file menu at the top of the application.
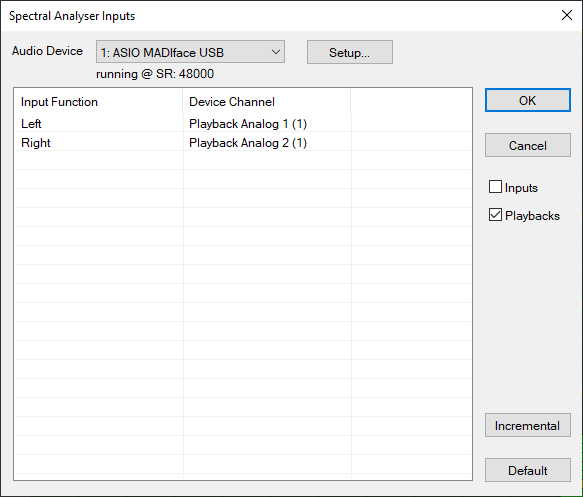 How to select audio channels for analysis
1 – To monitor audio in DIGICheck NG, right-click on any of the instruments and choose Input Selection (or go to Options > Instrument > Input Selection), which is where you can select which channels you wish to analyse.
2 – If you’d like to analyse an audio input, simply choose your inputs from the drop-down selections. This can be any inputs on your RME device – analogue channels like Microphones and instrument, or digital inputs such as ADAT or MADI channels.
3 – If you’d like to analyse audio from software, e.g. your DAW, scroll to the bottom of the list to find the Playback channels (you can also uncheck the Inputs box to display only the playback channels).
The playback channels are relative to the channels in TotalMix FX. So, if your DAW project is outputting on software playback channels 1 & 2 (middle-row in TotalMix), select these channels in DIGICheck NG for your Input Selection.
4 – Repeat this process for the other instruments in your DIGICheck NG layout.
Using multiple windows with DIGICheck NG
You can also separate the tools in DIGICheck NG into different Windows if you prefer: To do so, simply go to File > New Window, which will allow to create additional DIGICheck NG setups.
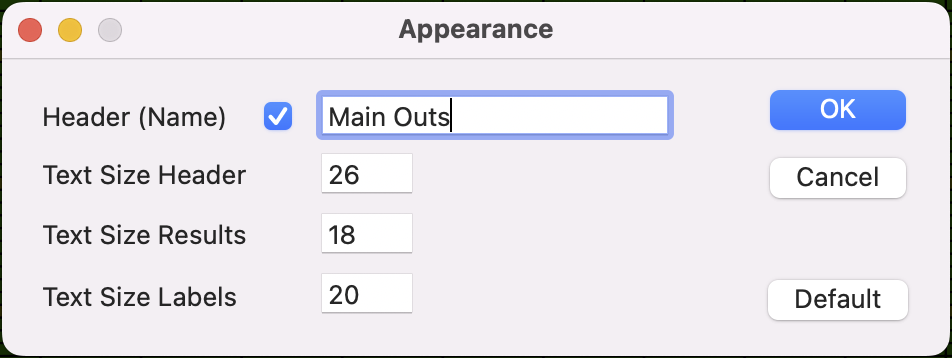 Changing the Font Size
To change the font-size, right-click on any of the Instruments and choose “Appearance…”.
Here you can individually adjust the font-size of each instrument, for example increasing the size of the numbers to better match your display. You can also check the Header box and enter a name for each instrument.
How to save your setup in DIGICheck NG
You can save any setups you create in DIGICheck NG (including the channel input selections) by going to File > Save Workspace As…
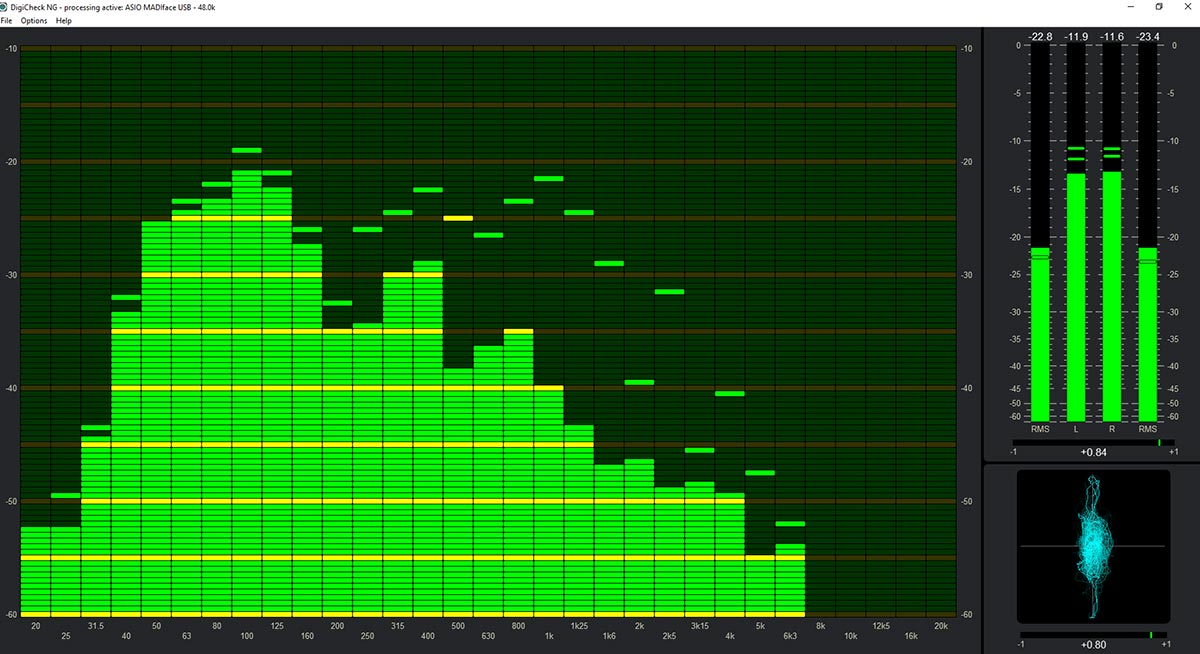 Recreating the Totalyser from DIGICheck
The Totalyser is one of the most popular tools / instruments from the original DIGICheck.
Combining a frequency analyser, level metering (with peak and RMS levels) and phase correlation, the Totalyser is perfect for traditional 2-channel / stereo music production, mixing and mastering.
To recreate the Totalyser in DIGICheck NG:
1 – Go to Options > Instrument Layout and choose the option labelled 3 – left. This gives you three instrument modules (one on the left and two stacked on the right).
2 – Right-click the left module and choose Type Selection > Spectral Analyser.
3 – Right-click the top-right module and choose Type Selection > Two Channel Level Meter.
4 – Right-click the bottom-right module and choose Type Selection > Vector Audio Scope.
5 – Now right-click the Spectral Analyser and choose Input Selection… to select which inputs you’d like to monitor (e.g. Playback 1 and 2).
6 – Repeat this process for the Level Metering and Vector Audio Scope / Phase Correlation meter.
7 – Drag the edges of the modules to re-size them to your liking.
8 – Finally, save your setup as a workspace by going to File > Save Workspace As… and give it a name, so that you easily recall it again at a later date.
Et voila! You now have highly accurate, low-CPU load frequency, level and phase monitoring for all your DAW projects.
To make further adjustments (e.g. to the spectral analyser’s response time), simply right-click an instrument and choose Settings to bring up the additional options, such as Display Range, Release Time and Display Mode etc.
You can also right-click the level meters and choose Settings > Horizontal Meter for horizontal metering if you prefer (note you’ll also probably want to change to Options > Instruments Layout > 3 – bottom for this view, then drag the level meter to the bottom).
See the full range of RME Audio Interfaces