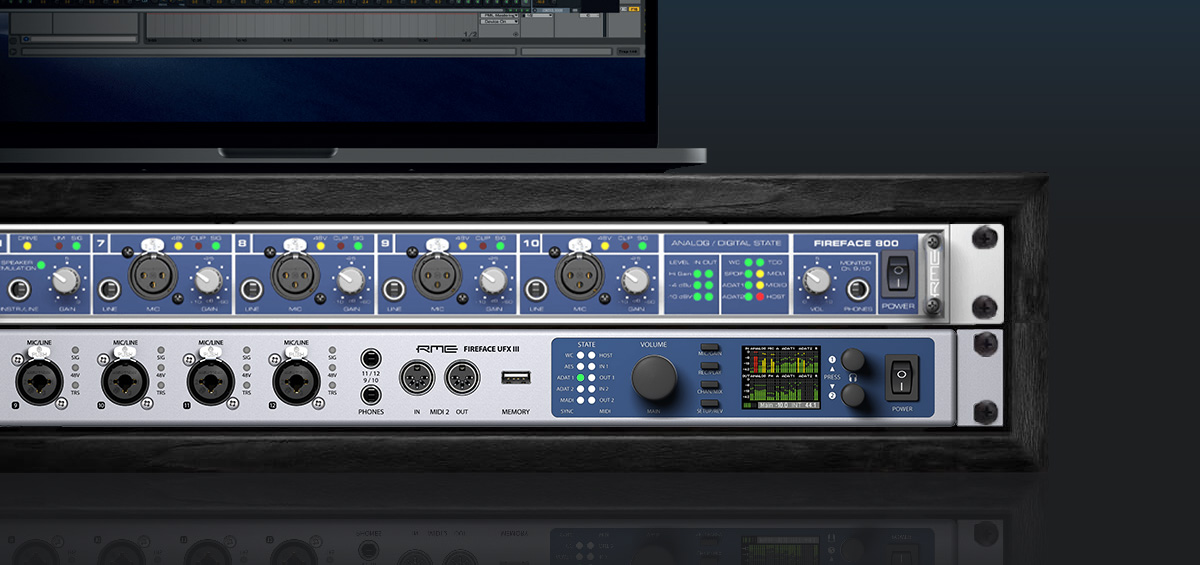
Set your old RME Fireface 400 or 800 to standalone mode and use it as an expansion for the latest generation of RME interfaces.
If you’ve upgraded to one of RME’s newer interfaces – such as the Fireface 802, UFX, UFX II, or UFX III – you don’t have to leave your RME Fireface 800 or Fireface 400 behind. With the right setup, you can repurpose them as standalone ADAT converters – giving you another 8 analogue inputs and 8 analogue outputs as extra I/O for your modern interface.
Watch our video tutorial or follow the steps below on how to connect the RME Fireface 800 (or Fireface 400) to a modern audio interface like the Fireface UFX II. We’ve used the 800 for our tutorial, but the steps will be very similar if you’re using the 400.
Interested in upgrading?
See our list of recommended UK RME Dealers, or contact us to discuss your requirements.
⚠️ Important note before you start:
To configure your Fireface 800/400, you’ll need to connect it to a computer via FireWire at least once. If you have an older Mac or PC that supports firewire, you can use that to prepare your Fireface 800 or 400. If you’re on a modern Mac, you will need the the following cables and adapters:
For Fireface 400
- FireWire 400 → FireWire 800 cable
For Fireface 400 and 800
- Apple FireWire to Thunderbolt 2 adapter
- Apple Thunderbolt 2 to Thunderbolt 3/USB-C adapter
This chain allows you to connect your Fireface 400/800 to a new Mac and access the Fireface Settings and TotalMix software needed for the initial configuration. Once the setup is complete, you can disconnect FireWire and run the Fireface in standalone mode, connecting with your newer interface via ADAT / TOSLINK cables.
 Step 1: Setting up the Fireface 800’s I/O and Clocking
The first step is to set up the clocking. This allows both devices to be perfectly synced together, so that all audio channels are sample-accurate when you hit play or record.
- 1. Connect your Fireface 800 to your Mac via Firewire (or the adapter chain above) and power it on.
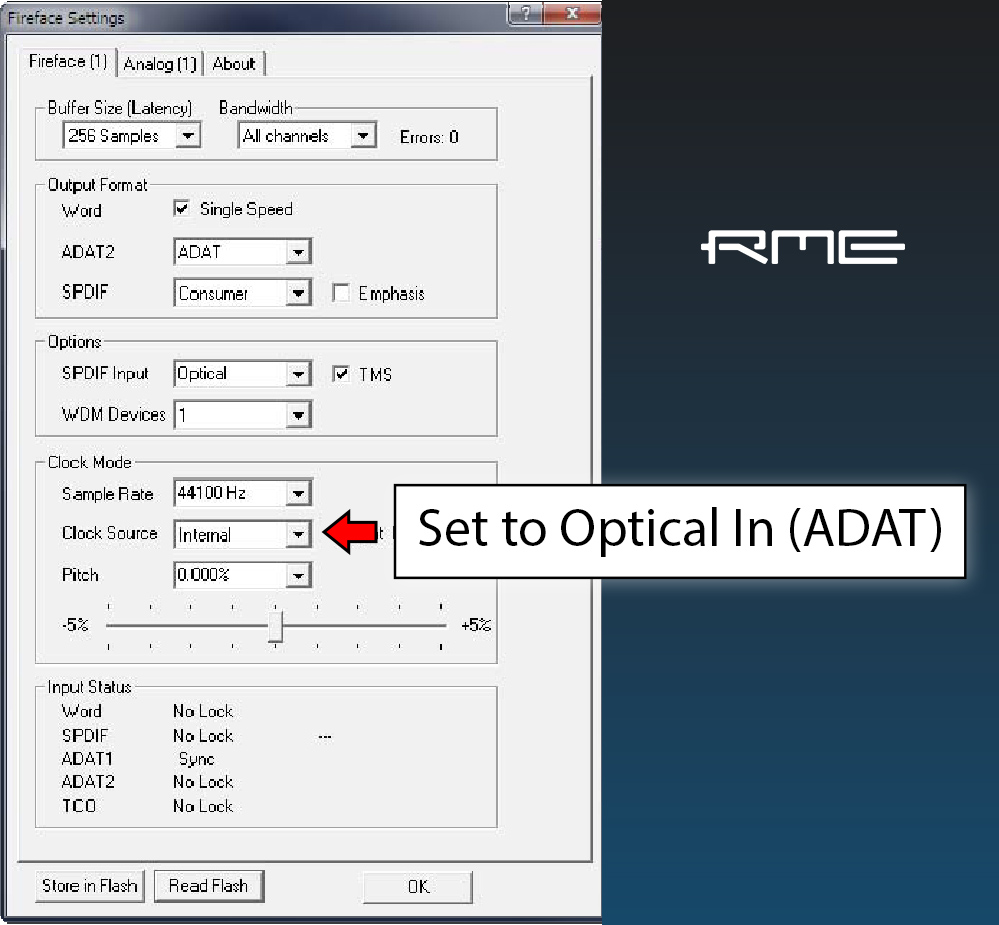
- 2. Open the Fireface Settings app* and set the Clock Source to ADAT In. This allows you to clock from the new interface (which you’ll later set as Master).
- 3. In the Analog tab, configure inputs 1, 7 & 8 to Front or Rear as needed, and set the appropriate Line In/Out reference levels (usually +4 dB for other studio gear). You can also turn on 48v phantom power here for the mic pres if required.
- 4. Click Store in Flash to save these settings to the device’s on-board memory.
* Note: the Fireface Settings app is a separate application to TotalMix, both of which are installed along with the driver.
Step 2: Set Up TotalMix (Channel Routing)
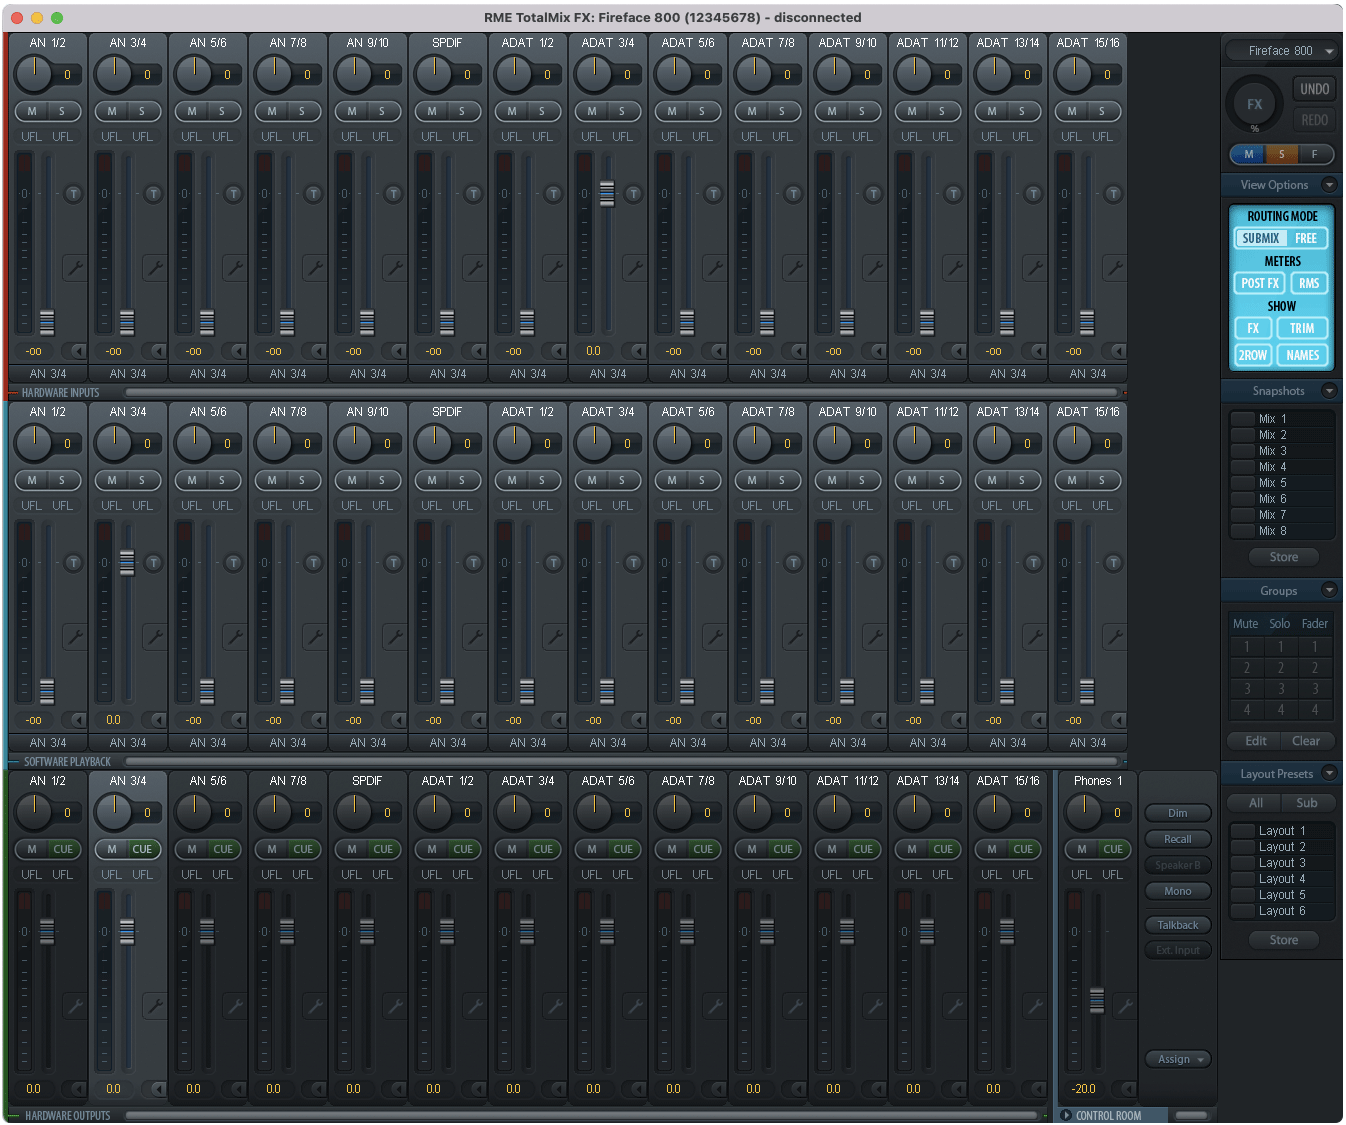
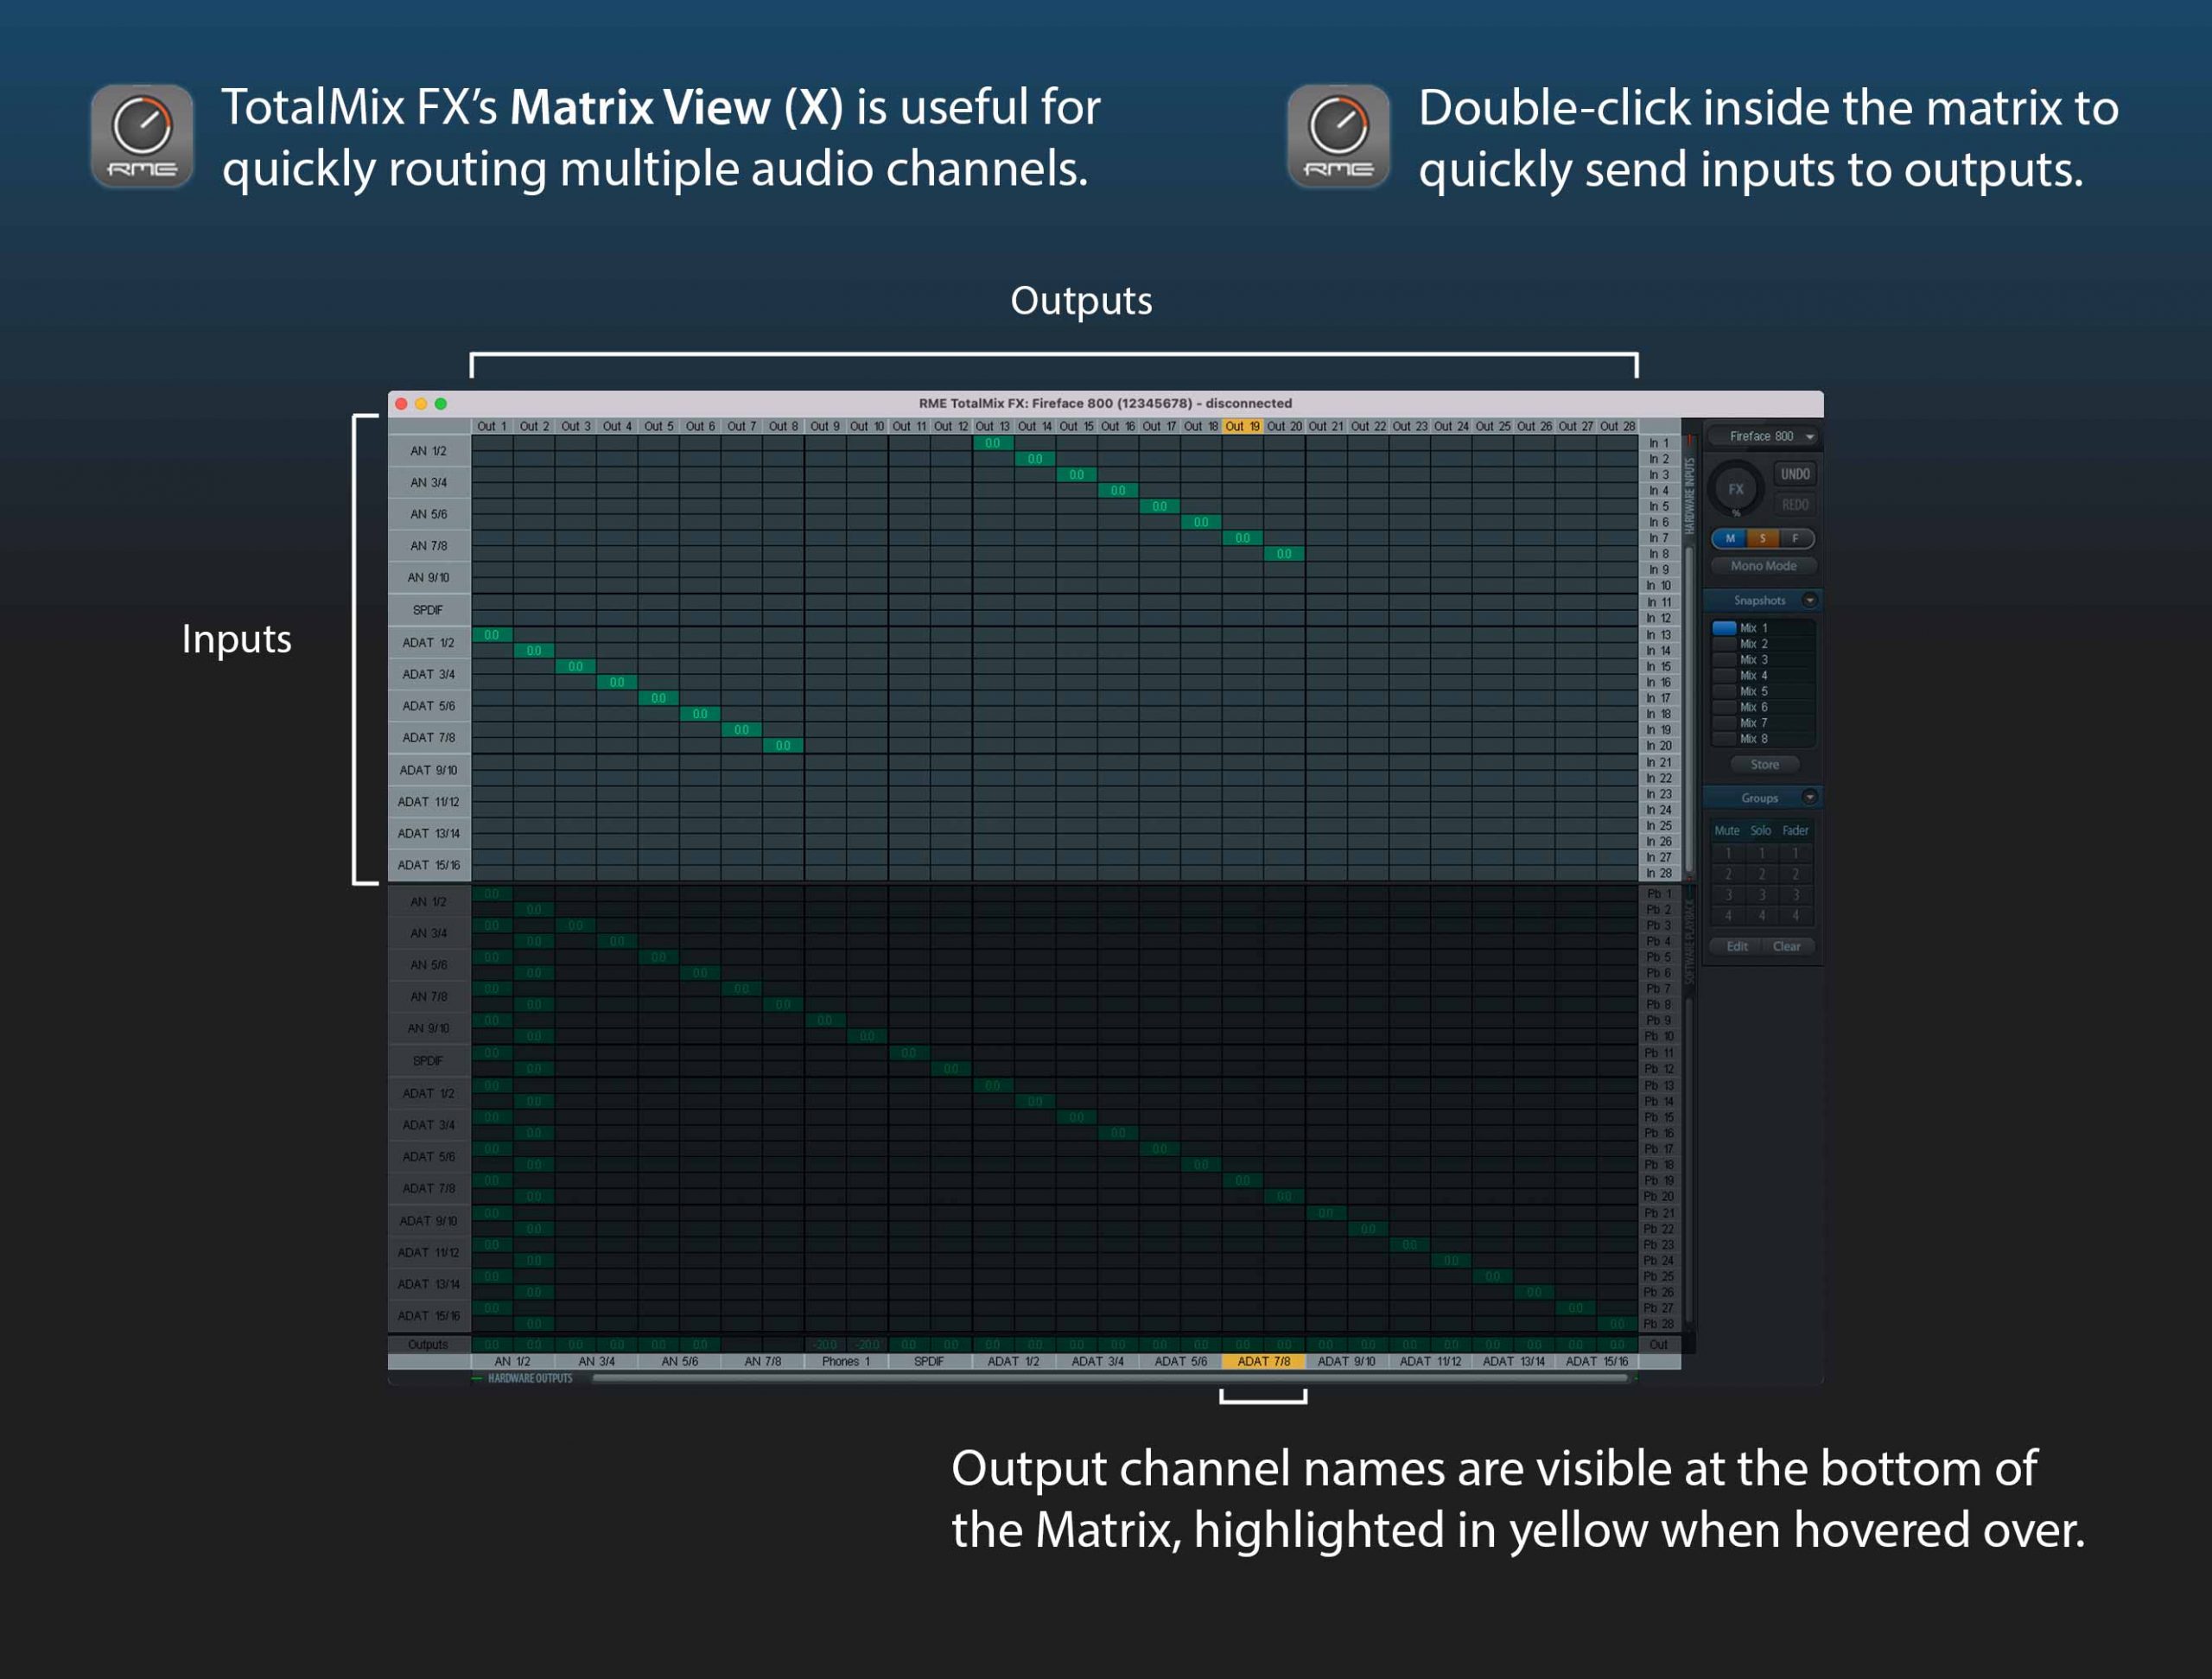
Next, use RME’s TotalMix mixer to route signals between each of the Fireface’s analogue I/O (inputs and outputs), and its ADAT I/O, which allows you to send individual audio channels digitally between the two devices.
This will be a 1-to-1 routing, so the Fireface 800’s Analog Input 1 will be sent to ADAT Output 1, Analog Input 2 to ADAT Output 2 etc.
Note: To route a channel in the Mixer, select the output channel first (bottom-row), then double-click the corresponding Input fader (top-row) to set it to 0 dBFS. The middle-row can be ignored entirely, as this relates to software playback channels (e.g. from a DAW such as Pro Tools, Logic, Cubase etc.)
The same goes for the hardware outputs – ADAT Input 1 to Analog Output 1, ADAT Input 2 to Analog Output 2 etc.
💡 Tip: Some users may prefer to switch to TotalMix FX’s matrix view for this. You can toggle between Mixer and Matrix using the keyboard shortcuts M (Mixer) and X (Matrix).
- Analogue Inputs (sent to ADAT outputs):
- AN in 1–2 → ADAT out 1–2
- AN in 3–4 → ADAT out 3–4
- AN in 5–6 → ADAT out 5–6
- AN in 7–8 → ADAT out 7–8
- Analogue Outputs (fed from ADAT inputs):
- ADAT in 1–2 → AN out 1–2
- ADAT in 3–4 → AN out 3–4
- ADAT in 5–6 → AN out 5–6
- ADAT in 7–8 → AN out 7–8
When finished, select Options → Flash current mixer state to store the routing to the interface.
Now all of the analogue inputs are routed to their corresponding ADAT outputs, for passing signals to your new interface. At the same time, all of the analogue outputs are fed from the ADAT Input (passing signals from your new interface back to the Fireface 800).
You can now power down the Fireface and disconnect the FireWire cable – standalone mode is ready.
💡 Want to know more about ADAT? Check out our article 👉 What is ADAT? | Synthax Explains
Step 3: Connect the Fireface 800 to your new RME interface
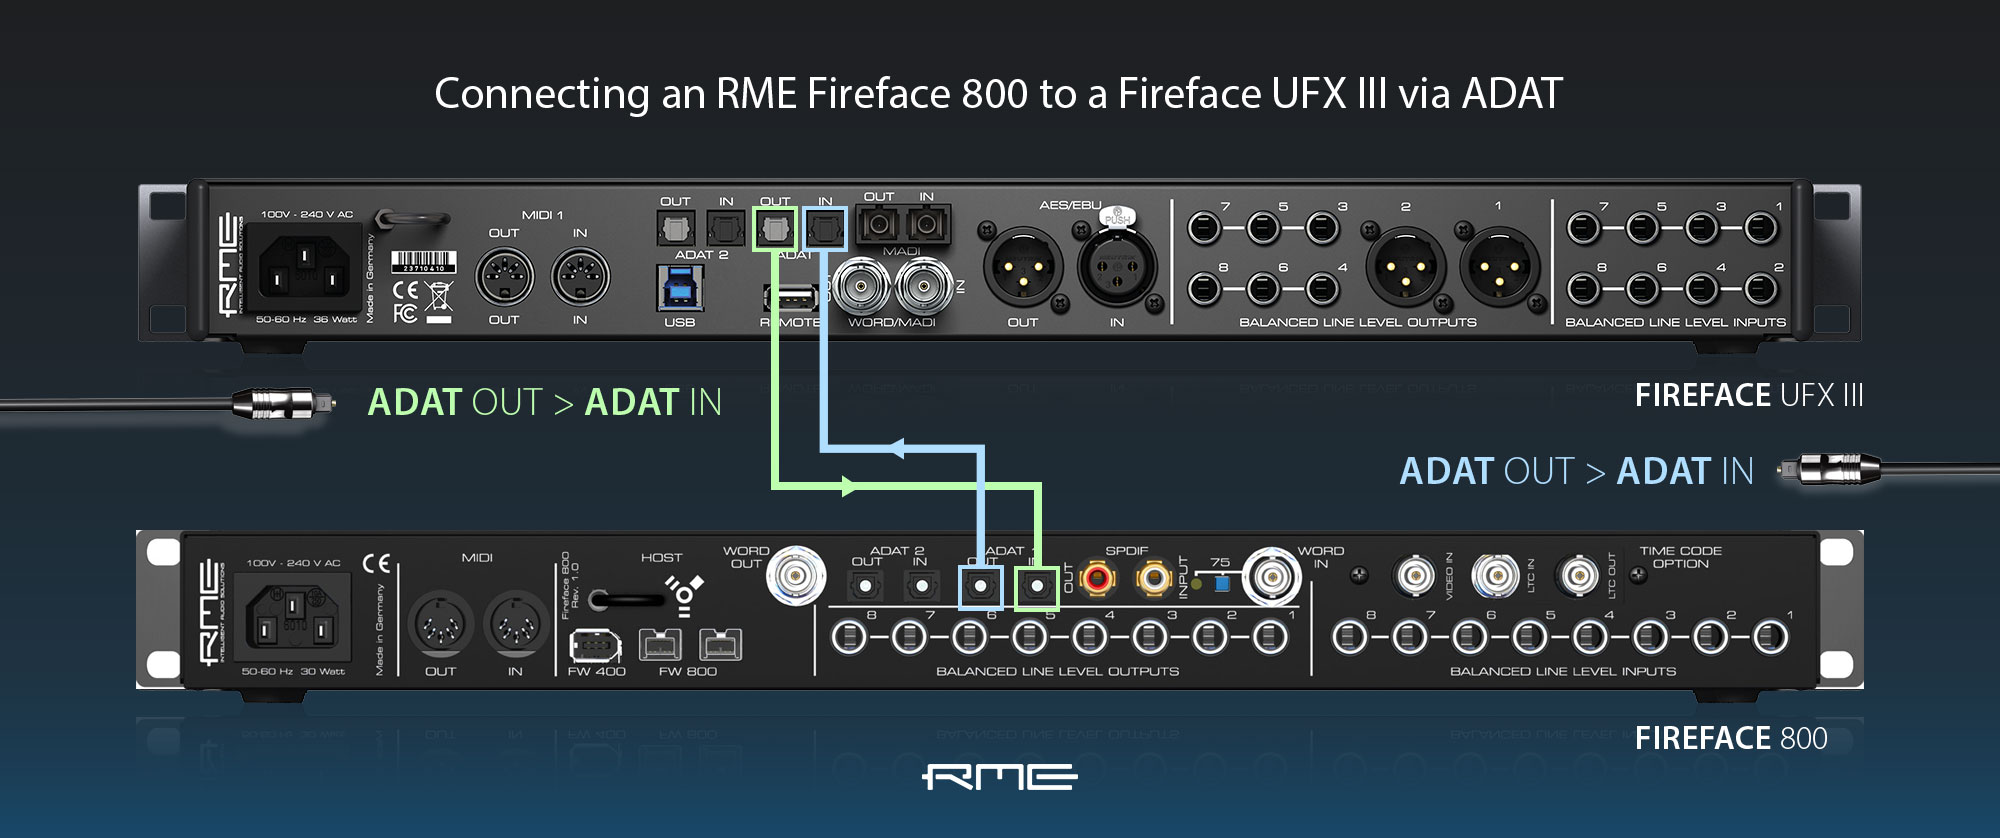
- 1. Use two ADAT optical / TOSLINK cables to connect between the Fireface 800/400 and your newer RME interface. This will enable all 8 analogue inputs and 8 analogue outputs.*
- 2. Power on both devices.
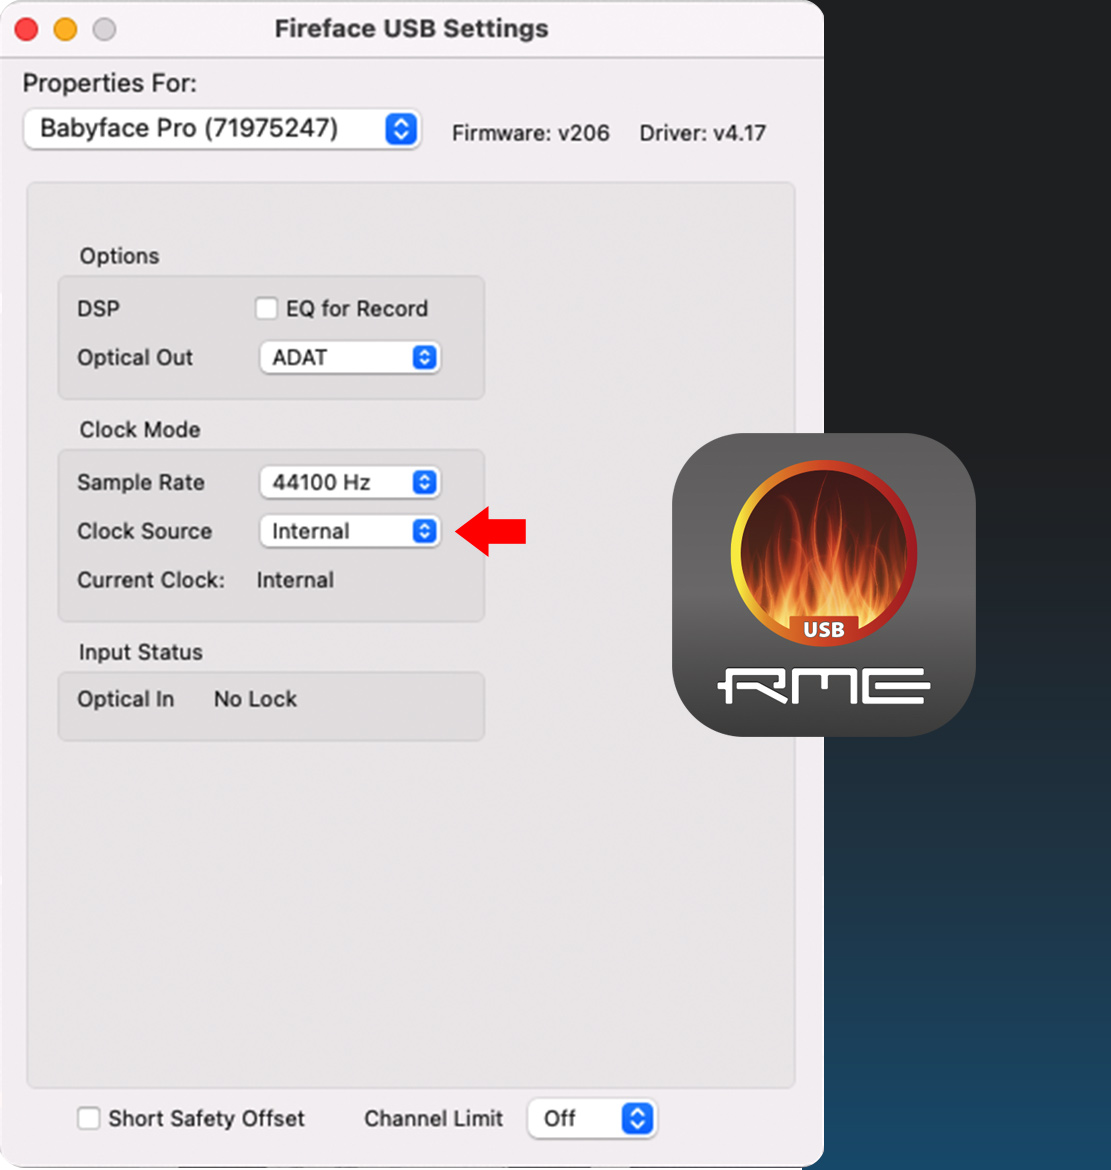
- 3. Connect your newer interface to a Mac or PC via USB, then use the RME Settings app to set the Clock Source to Internal. This sets your new interface as the clock master.
- 4. Now anything you connect to the Fireface 800’s analogue inputs will be sent to ADAT channels 1–8 on your newer interface, and thus appear in the top-row of TotalMix FX.
- 5. At the same time, you can send signals out through the Fireface 800’s analogue outputs via your newer interface’s ADAT outputs 1–8 (bottom-row in TotalMix FX).
*ADAT allows for the transfer of 8 inputs or 8 outputs at 44.1 or 48 kHz sample rates. If working at 96 kHz, channel counts are halved (4 in / 4 out), and again for 192 kHz operation (2 in / 2 out).
Conclusion
By using the RME Fireface 800 (or 400) as a standalone ADAT converter, you can extend the life of your legacy hardware and add a bank of high-quality analogue I/O to your modern RME interface. This ADAT expansion method is cost-effective, reliable and a great way to get more connectivity for hybrid setups, hardware synths or large multitrack recordings.
Even years after release, the Fireface 800 and 400 remain incredibly useful tools when paired with RME’s latest gear.
See the full range of RME Audio devices
