


A guide to using RME’s control software for the ADI-2 DAC FS, Pro FS R and 2/4 Pro SE.
Controlling your RME’s ADI-2 Series USB-DAC and headphone amplifier just got a whole lot easier thanks to the release of RME’s software control app.
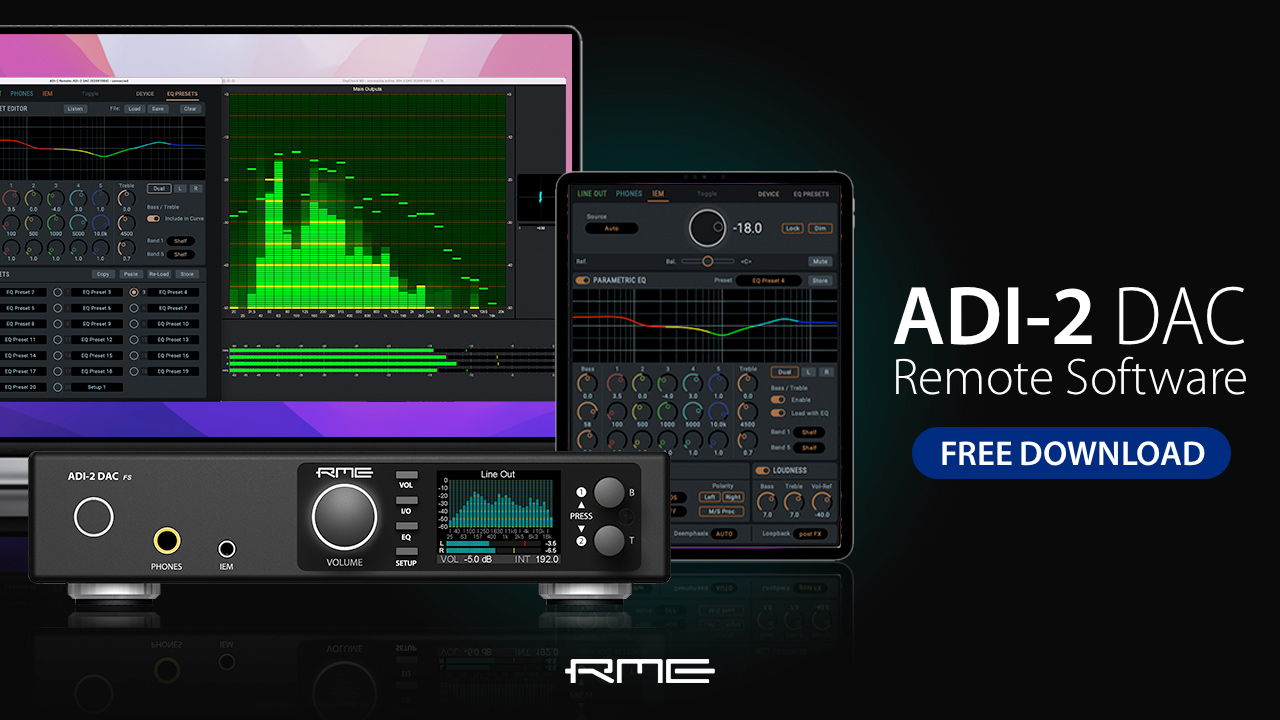
Available as a free download for all ADI-2 Series users, the software remote allows you to control every aspect of you device straight from your PC, Mac or iPad when connected via USB.
To download the RME remote for yourself, head over to the downloads section of the RME Audio website, or watch our video for a run-through of this fantastic new way to control RME’s range of high-end AD and DA converters.
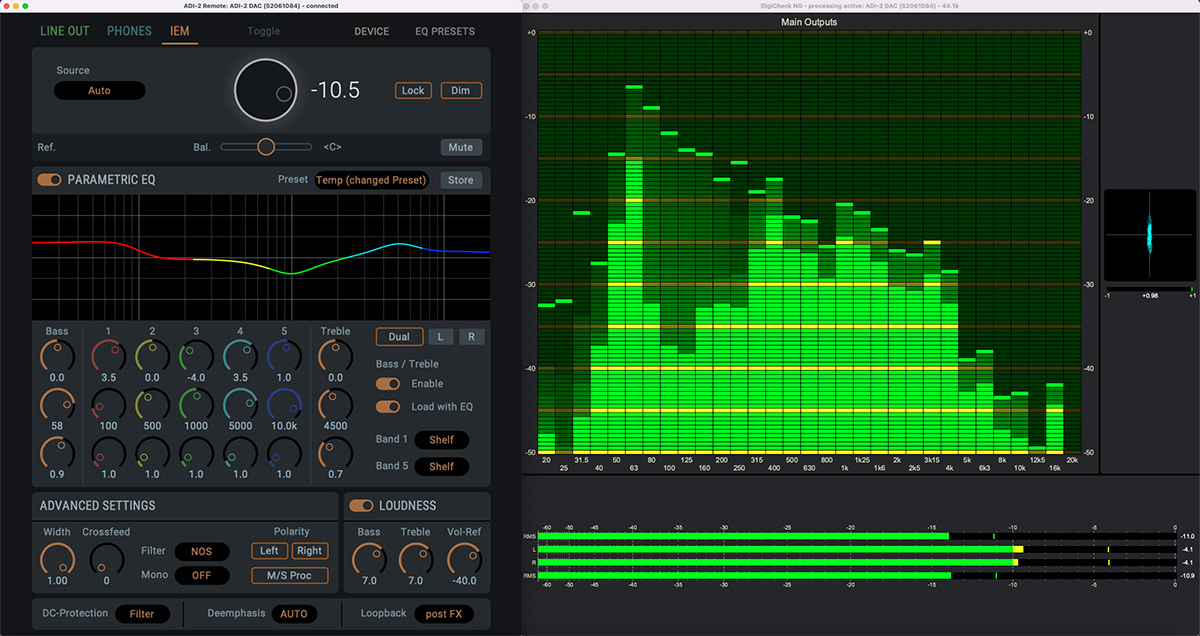
The RME ADI-2 DAC FS software alongside RME’s DIGICheck NG
Features Galore
Whilst having so many features makes the ADI-2 DAC FS a real joy for those who love to play around and tune their playback experience, the front panel can sometimes be a bit overwhelming. If you’ve ever felt a bit lost diving through its vast menu system, you’re definitely not alone.
The option to control the ADI-2 DAC directly via software will therefore be a welcome addition to anyone who enjoys tinkering with its many features – namely the on-board parametric EQ, Loudness On/Off and Crossfeed – or experimenting with the DACs different filter types (SD Sharp, NOS etc). Settings can also be saved to your Mac, or stored as presets on the device itself.
How to install
To install the RME ADI-2 Series remote software, go to RME Downloads and select the software for your operating system (Mac or Windows) from the software select drop-down menu.
Once you’ve downloaded the zip file, run the installer to add the application to your hard drive.
Note that you may also need to update to the latest firmware – to do so, use the left-hand drop-down menu to select your device (e.g. ADI-2 DAC FS), then your operating system (e.g. Mac), then click the link to download and run the flash update tool (named fut_madiface_mac.zip for Mac).
With your ADI-2 DAC connected to your Mac via USB, the software should now recognise your device.
 RME ADI-2 DAC Remote Software – Quick Guide
The ADI-2 DAC Remote software is simple and intuitive to use, and its features will be instantly recognisable to longtime ADI-2 Series users.
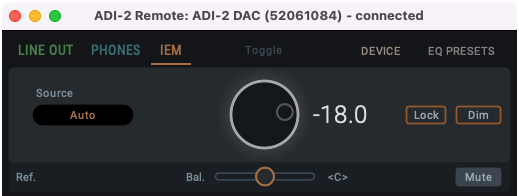
Starting at the top you have the output section – click the tab for whichever output you wish to change the settings for, for example the IEM output.
Next up you have your Source selection, which can be left set to Auto, and the volume control. You can also lock the unit from here, and Dim the volume (temporarily dropping the output level – useful if you receive a phone call etc), as well as control the left/right balance and the Mute switch.
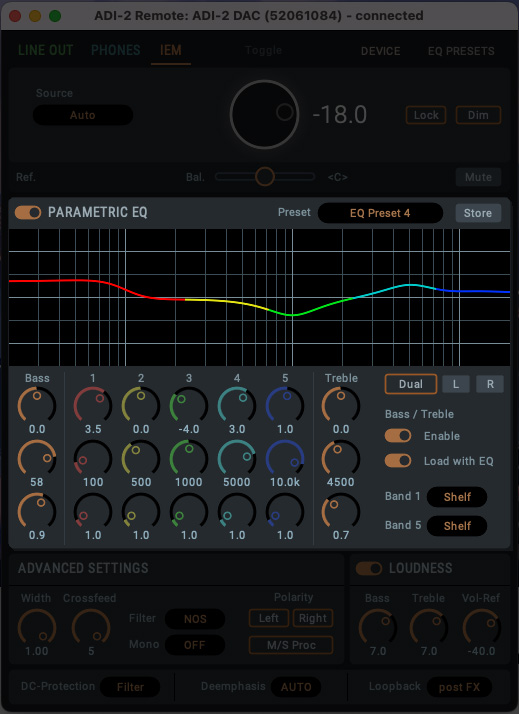 Parametric Equalizer
Now we move into the EQ section. The ADI-2 DAC FS has long been popular for adjusting the EQ curve to suit different pairs of headphone (check out RME’s video on that here), and now you can do this straight from your Mac or PC!
After the EQ’s on/off switch, we have the eye-catching parametric equalizer, which features 5 adjustable bands, along with the bass and treble controls.
If you’re familiar with EQ then chances are you won’t need any explanation on how to use this section, but here’s a quick run-through just in case:
Starting with a single Band (e.g. Band 1), you’ll find three vertically-stacked encoders. The top is the gain control, which allows us to increase or decrease the level of the chosen band (with 0 being no boost or cut applied).
The middle encoder controls the target frequency (20 Hz – 20 kHz), whilst the third encoder adjusts the Q (Quality or Q Factor), which alters the shape of the curve for the EQ band.
Whilst there are no set rules when it comes to EQing, a good rule of thumb is that narrow Q settings are generally good for making cuts (-), whilst wider curves are better for boosts (+), and tend to sound more natural.
Finally we also have the Bass and Treble controls. These two bands have fixed curve types (shelf EQ), with the cut-off frequency for each band fully adjustable, along with the Q control.
Dual Button
To the right of the EQ we also have the Dual button. The ADI-2 DAC can famously apply EQ to the left and right channels independently – great for those who are hard of hearing in one ear, or if you want to make some slight room adjustments when connecting the DAC to speakers.
Pressing this button allows us to create different EQ curves for the left and right channels.
Saving the EQ settings
The EQ section also allows you to save your settings as a preset. Click on the Store button and give your preset a name, and choose whether you want to save it to your hard drive, or to one of the ADI-2 DAC FS’s on-board memory slots.
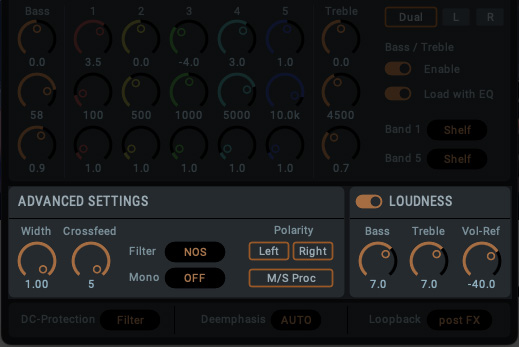 Advanced Settings – Width, Crossfeed and Filtering
Next up we have the section labelled Advanced Settings.
Here we can adjust the Width (Mono < > Stereo), and try out the Crossfeed.
What is Crossfeed?
If you’ve not come across Crossfeed before, essentially it works by feeding a small amount of the left channel into the right, and vice versa.
Headphones provide a very isolated way of delivering sound to our ears – in the real world, a sound source is received by both ears (albeit with a slight delay between them, which helps us perceive what direction a sound is coming from).
Crossfeed therefore emulates the experience of real-world listening – like when listening to a pair of speakers, or watching a live band – by playing a small amount of sound from one channel into the other. The effect of this tends to vary with different recordings, but can work very well on certain types of music – well worth experimenting with!
The Advanced Settings is also home to the filter section, which allows you to change the type of filtering the DAC uses, such as the SD Sharp or NOS filter. We can also swap the polarity here – useful for checking that speakers aren’t aligned out of phase, or for checking phase issues in music production – and activate the Mid/Side mode.
 Loudness
We also have the DAC’s popular Loudness section, which many will remember from older HiFi amplifiers. This clever feature adjusts the treble and bass in response to volume changes, providing a more consistent listening experience regardless of the volume level.
As with most things on the DAC, the treble and bass are user-adjustable, so you can fine-tune them to find your perfect settings.
DC-Protection, De-emphasis and Loopback
Finally we have a switch for the DC-Protection filter, and the Deemphasis control (which allows you to add or remove some of the highs on some digital material – more info can be found on p55 of the RME manual here).
You’ll also find the Loopback button here in the bottom-right, which you’ll need to activate if you want to use the ADI-2 with DIGICheck NG, RME’s free suite of audio analysis tools. You can choose between pre FX, i.e. measuring the signal before the EQ is applied, as well as post FX and post FX at -6dB.
Device Tab
The Device tab gives you access to a range of functionality to adjust the hardware. You can choose whether the line outputs are muted when headphones are inserted, and also whether the device will enter standby automatically when no signal is detected after a set amount of time.
There’s also a range of DSD playback controls, including a switch for enabling DSD detection, DSD filter options and control of DSD Direct mode.
The clock subsection does as the name suggests, allowing changes to the clock source and sample rate. With the ADI-2 series featuring RME’s SteadyClock FS technology, it’s worth keeping this set as internal, and clocking any other digital audio devices in your chain to the ADI-2, though the option to slave the ADI-2 is there should you need it.
The ADI-2 series is also capable of sample rates all the way up to 768 kHz, but in most cases, the media player can dictate this setting for the best audio performance.
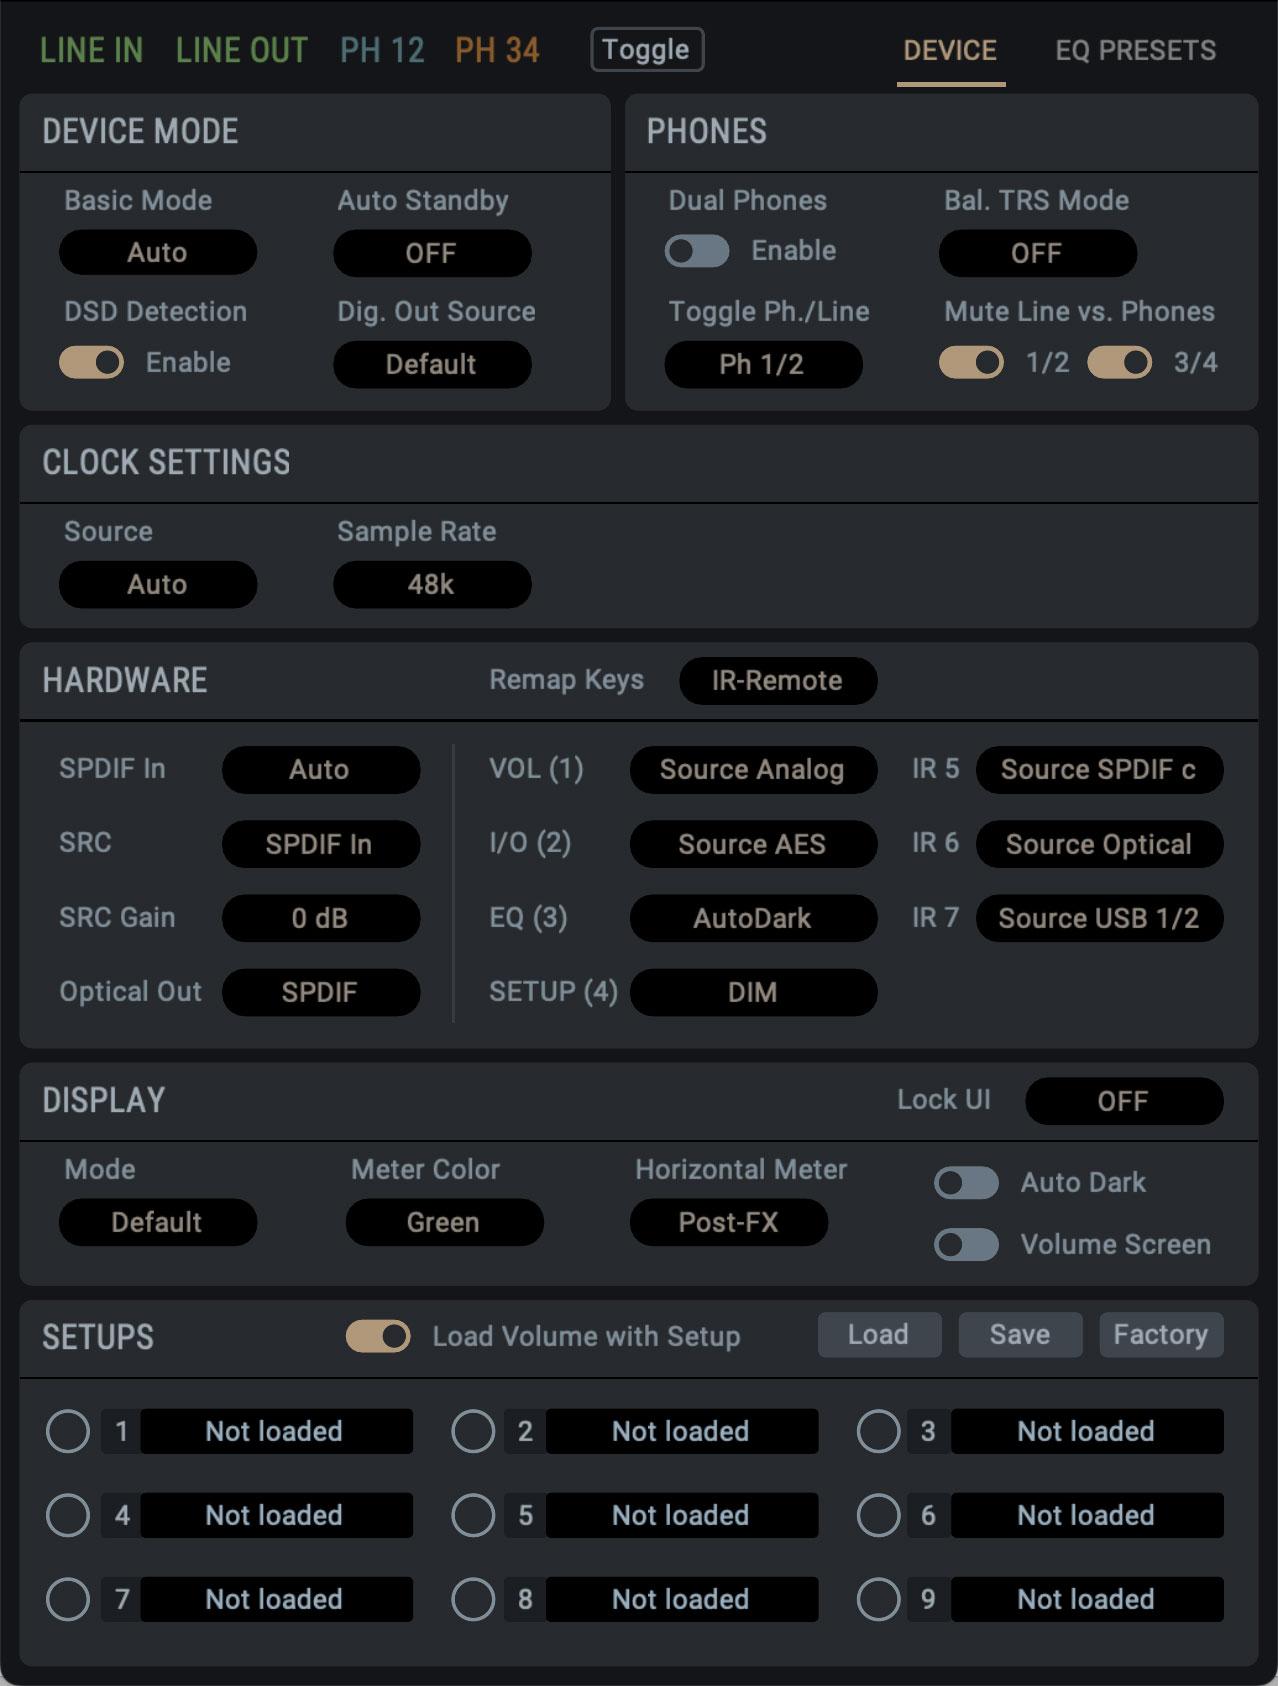 With the remap keys section, it’s possible to configure and add quick commands to each of the front panel buttons, as well as the four configurable buttons on the remote.
Setting this to ON enables both the ADI-2’s four front panel buttons, and the remote’s 4 numbered buttons, as shortcut keys, while setting it to ‘remote’ enables the Remote control buttons only.
So for instance, in ON, if you wanted to add the Dim command to the volume button, pressing the volume button on either the remote or the front panel will now Dim the output.
You can still access the normal menu system on the front panel by pressing and holding.
There’s a whole load of options here you can save as shortcuts on your remote or front panel – Setup choices, Mono control, Crossfeed and EQ presets for example – making it easy to customise the physical remote and front panel to your liking.
And then we have the display settings, which offer a few tweaks to the behaviour of the ADI-2’s front panel display, such as switching to Dark Mode, or changing the colour of the display’s metering.
There’s also a pair of controls for enabling the AutoDark feature, and another control for the volume screen, which enables and disables the large volume display on the screen when the level is adjusted.
Saving a Setup
Once you’re done adjusting all of these settings, you can save them as setups.
There’s nine available slots, each of which will store the entire state of the device into one of the SETUPS. Note that the EQ Presets are not included in the stored setup – they are stored separately, and are available for any of these 9 setups.
To save a setup, click the SAVE button, then click on one of the setup slots. Loading is the exact same – just click the LOAD button once, then click on your desired setup.
To factory reset the settings, you can press LOAD followed by FACTORY. This resets all of the settings adjusted on the controller, but keeps your currently stored setups and EQ curves, meaning you get a nice clean slate to create a new setup from.
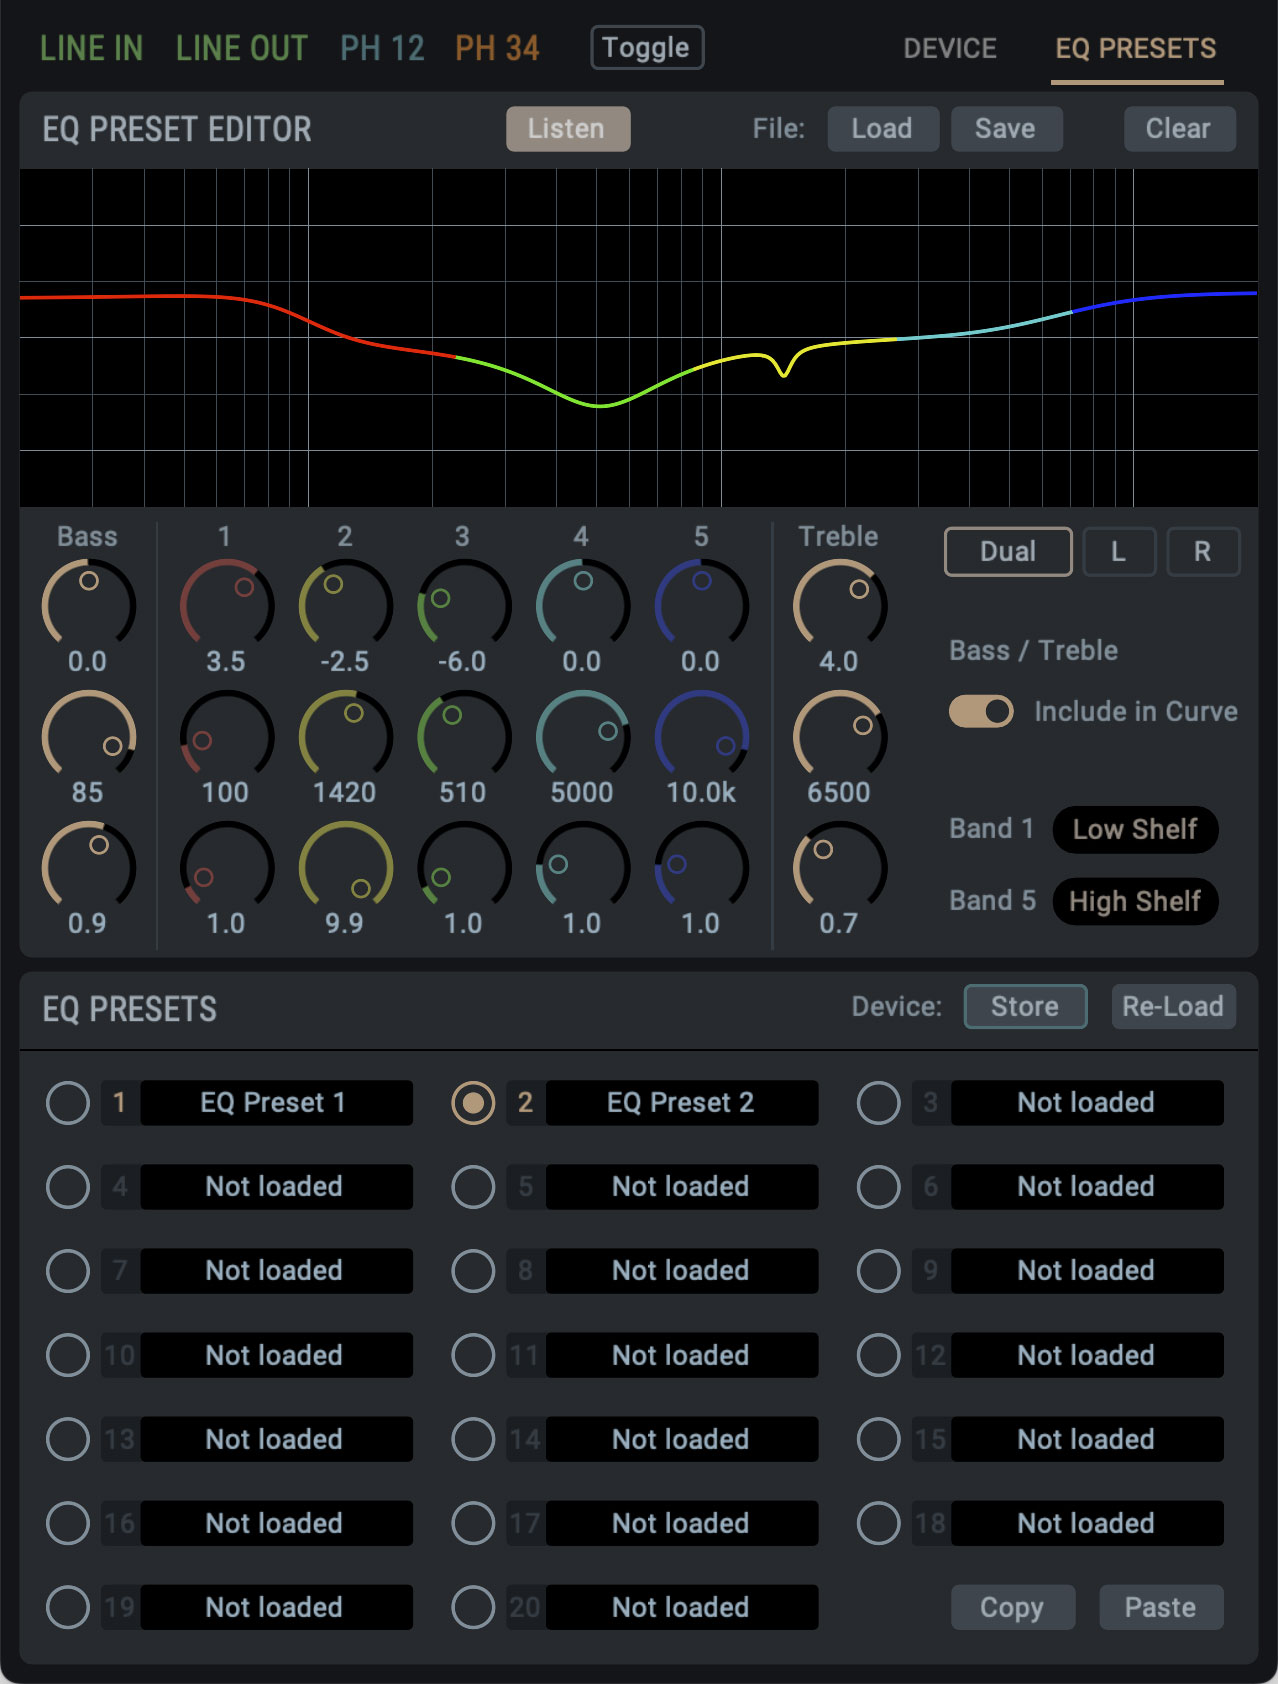 EQ Preset Editor
Under the last tab, EQ Presets, you’ll find the extensive EQ Preset Editor. It’s identical to the EQ view in the output panels, with the added PRESET section. Unlike the output panels, this section is devoted solely to creating EQ presets, as well as the management of these presets.
The main feature of this page is its LISTEN function, which allows you to quickly preview any of your saved EQ curves, and A/B them with another EQ curve you currently have loaded.
It’s also possible to save EQ presets as standalone files. Let’s say you’ve created an EQ curve for your Sennheiser headphones – you can save this EQ curve to your computer’s hard drive as a file and recall it at any time, or even share it with other ADI-2 users.
Finally you have the EQ Presets section. This is where you can find all of the various EQ presets stored to the device itself. There’s twenty slots to use, and if you want to use one preset as a starting point for another, you can copy and paste this into a new slot. You can also name each Preset individually from within the remote software, and if you click on the Store button, the EQ curve will be stored to your ADI-2 itself.
Saving all of your settings
One final thing worth noting is that you can save your entire setup by going to File > Save Setup As. This allows you to create a backup of everything on your ADI-2 – so, all of your Settings, EQ curves etc, all saved to a master file you can easily recall any time.
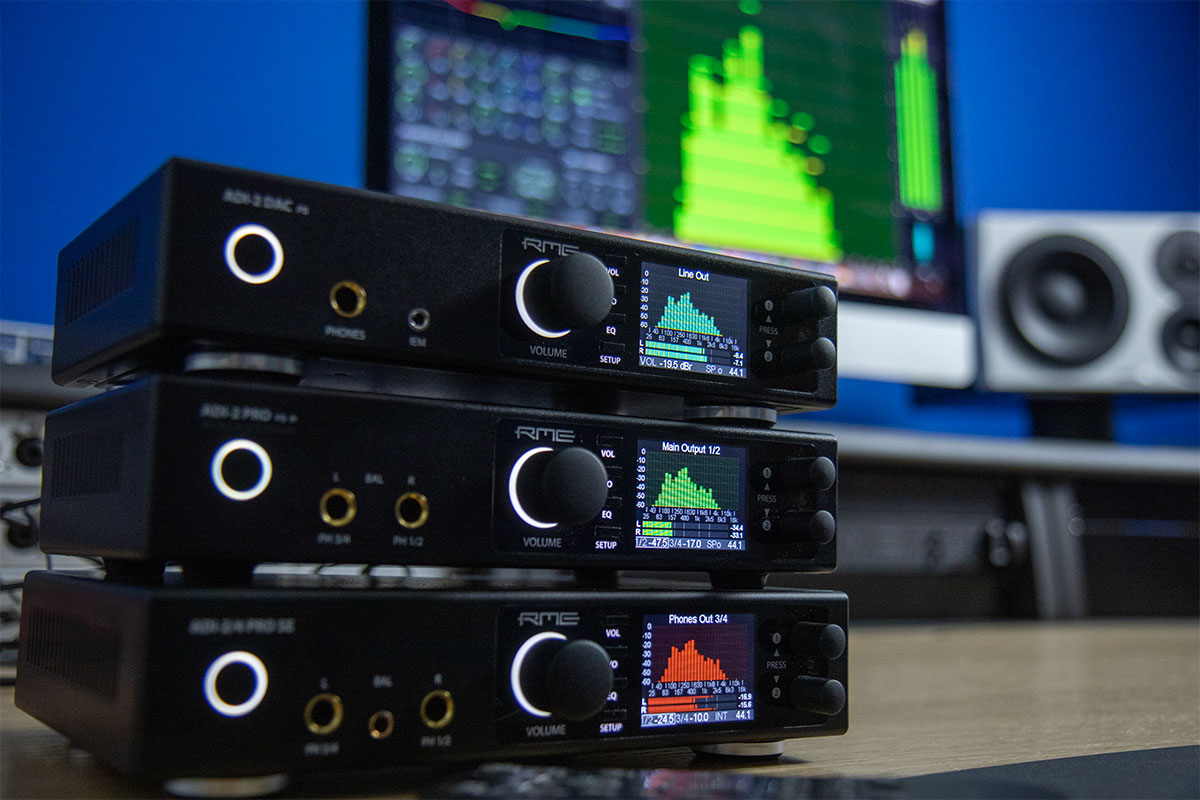
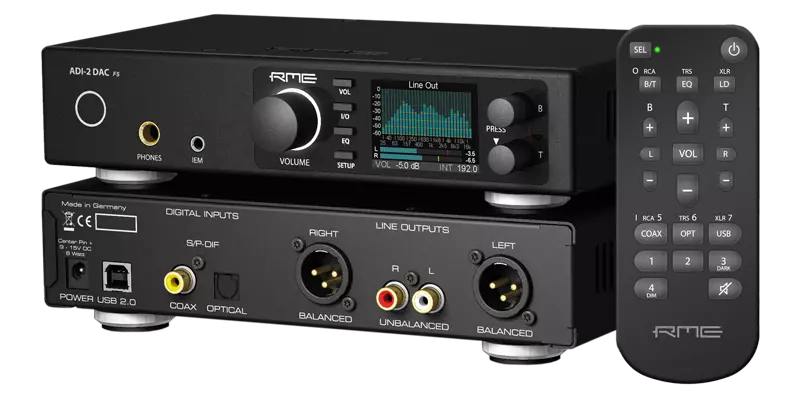
Ultra-Fidelity Reference Class Converters
The RME ADI-2 Series is an award-winning range of ADCs, DACs and headphone amplifiers from German pro audio specialists RME Audio.
Adapted from its beginnings as a studio and mastering converter of the highest quality, the latest generation of ADI-2s have been optimised for the Audiophile and home Hi-Fi markets, with a host of fresh ideas, innovative features and numerous useful functions.
Combining high-end DA conversion with exceptional headphone outputs, remote control and USB operation, the ADI-2 DAC and Pro FS R have received countless enthusiastic reviews for their sound, flexibility, and technical capabilities.
Welcome to a new standard of digital audio technology: This is RME.