


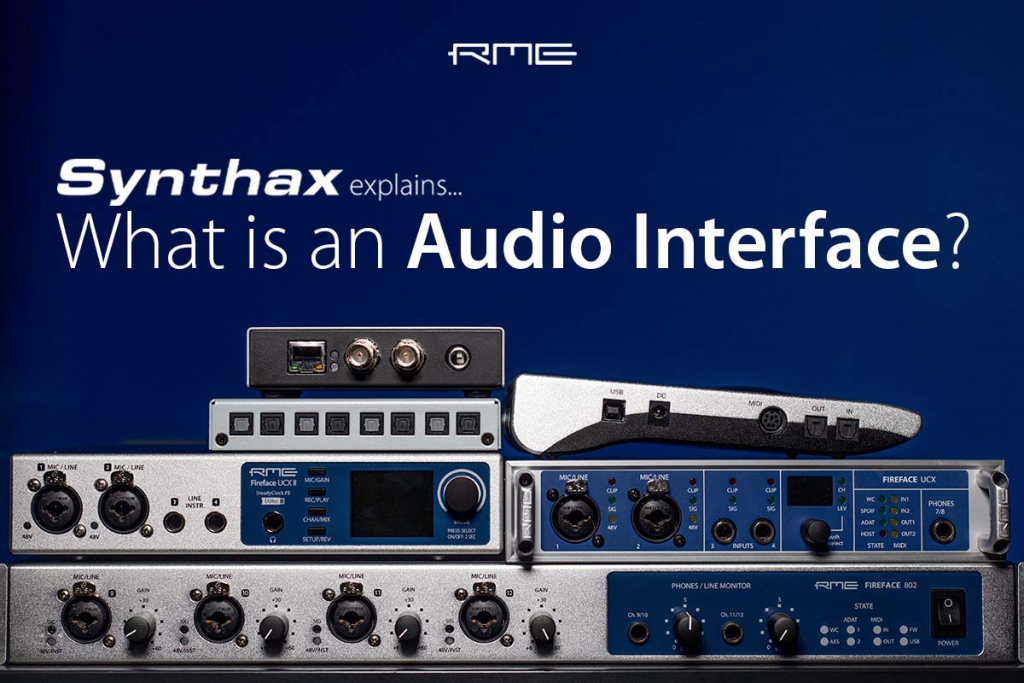
Have you ever wondered “what is an audio interface?” Read on for a detailed introduction to this music production toolbox, or check out our video below.
If you do any kind of sound recording or music production, chances are you’ll require an audio interface. It’s probably the most important part of any modern PC or Mac-based recording setup, acting as a central hub for all of your studio needs.
As the official UK distributor for RME Audio, interfaces are some of the most popular devices we supply, and can be found in a wide variety of scenarios – from home recording and projects studios; to commercial recording studios, live music tours and theatre productions; broadcast audio and live sound installations; and even measurement testing and scientific applications.
And whilst the majority of our catalogue is aimed primarily at professional users, some of our products are also suitable for use in home recording, as well as smaller project studios looking for the exceptional flexibility, reliability, and high-quality sound that RME devices are known for!
But what exactly is an audio interface? Read on for a deep dive, or watch our video for an intro to this key component in audio recording, mixing and music production.
Contents
What is an audio interface – Video
See more videos at Synthax TV
What is an audio interface?
An audio interface is an external device that lets you monitor and record audio with your computer. You can connect microphones, instruments and other devices for recording, as well as speakers, studio monitors and headphones for listening back to what you record, also known as ‘monitoring’.
You can also think of an interface as an external sound card – only a much higher quality one than those that are traditionally built into an off-the-shelf PC, Mac or Laptop – and one which is specifically designed for recording and music production, with dedicated connections to match.
Do I need an audio interface?
An audio interface is the most important part of a modern recording setup, and this remains true regardless of the size of your recording rig.
From bedroom producers, musicians and singer-songwriters doing everything ‘in the box’, all the way up to full-time sound engineers working in commercial recording studios and on large-scale tours – if you’re using a computer (and a DAW) for recording and mixing sound, you need a means of getting those individual channels of audio in, and out, of your Mac or PC.
An audio interface is designed to do just that, and as such there’s a wide range available depending on what features you need, and how many channels you plan to record.
How does an audio interface connect to a Mac or PC?
Most interfaces these days connect to a computer via USB or Thunderbolt, although if you have a desktop machine you may prefer to use a PCIe sound card, which is installed directly onto the motherboard.
It’s also worth noting that in previous years, Firewire was generally the connection of choice, although that’s for the most part now been superseded by USB and Thunderbolt.
Equally you may also come across interfaces that use ethernet, which is generally found on devices designed for audio networking. These tend to be used less in home studios however, and are more commonly found in larger audio installations, production studios, or live audio setups.
What are the main features of an audio interface?
It should already be clear that an audio interface is essentially a combination of several different audio devices, all rolled into one;
- A computer sound card
- An analogue to digital and digital to analogue converter (also known as an AD/DA converter, or an ADC/DAC)
- A microphone preamplifier
- An “I/O box” with a variety of different audio connections
- A headphone amplifier
- And sometimes a digital audio format converter as well
Many of these devices can also be purchased separately as standalone devices, usually for expansion purposes. An audio interface combines all of the above into a single, convenient device.
Along with the different connection types (which we’ll get to in a moment), common features to look out for include level metering; physical (or software) controls for microphone and instrument gains; switches for turning on 48v phantom power, or changing the input between line and instrument level (often labelled ‘Hi-Z’); and monitor controls – volume controls for headphones and speakers.
What is DSP?
Some interfaces also feature DSP – digital signal processing – which is kind of like having a mini computer inside of the interface. The DSP can be programmed by the manufacturer to handle a bunch of different processing tasks, essentially taking away some of the heavy lifting from your Mac or PC.
Depending on the interface, the DSP may allow you to do things like run plugins directly on the interface itself, or in the case of RME, provide a software controller for all of your channel routing. This gives you the option to freely send audio to different places – such as multiple headphone mixes when you’re working with other musicians – or to other dedicated devices such as effects boxes (often known as ‘studio outboard’).
The DSP on RME audio interfaces is also responsible for the ‘FX’ part of TotalMix FX – RME’s software mixer, which is included with all RME interfaces and sound cards – and offers things like EQ, Compression, Reverb and Delay.
For RME devices, the main purpose of these effects is to provide singers and musicians with an enhanced headphone mix when they’re recording, and is achieved with minimal latency, and without using any processing power from your computer’s CPU.
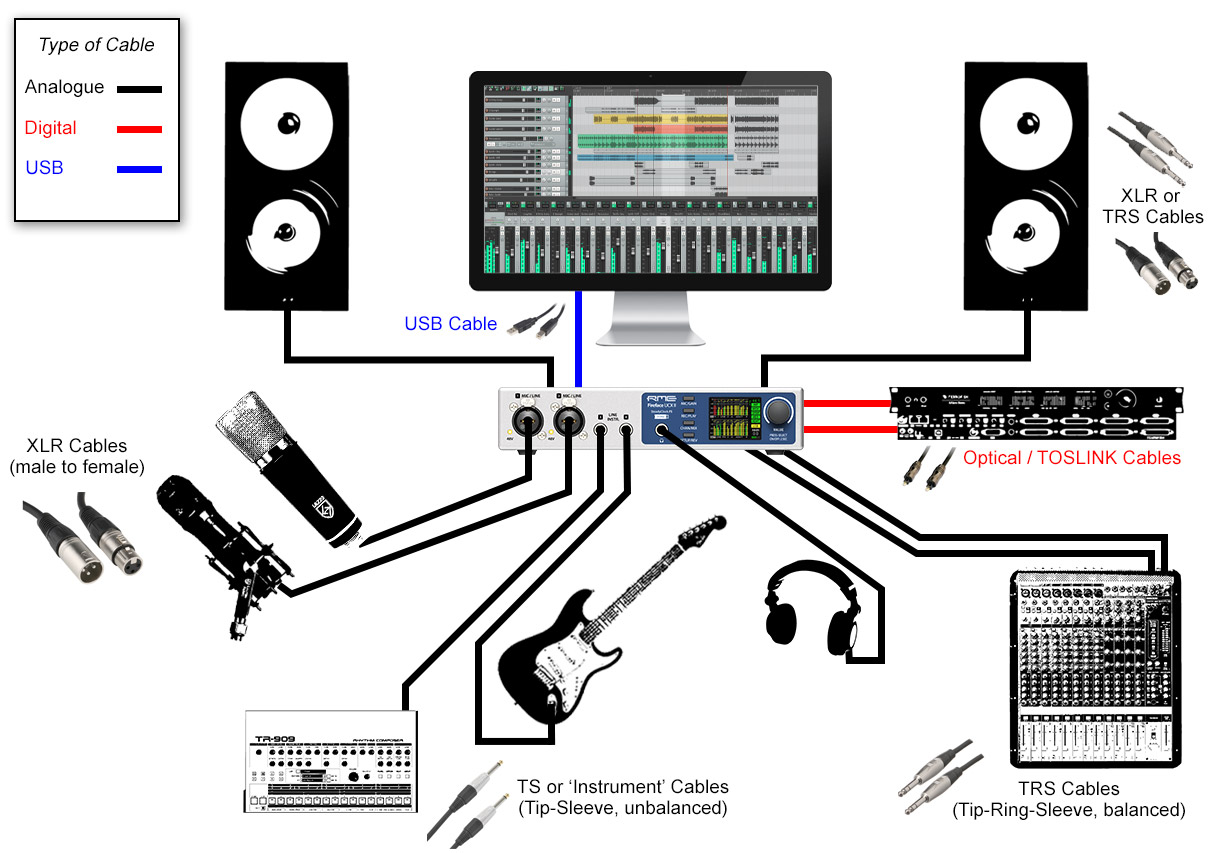
Types of Connections (Inputs and Outputs – I/O)
Audio interfaces can feature a variety of different analogue and digital connections. The number of different sources you can connect at any one time depends on the interface’s channel count – in other words, the number of physical inputs and outputs you have available (both analogue and digital), often abbreviated to I/O.
Inputs allow you to send sound into the interface, whilst outputs are for sending sound out of the interface. Analogue input signals – such as those generated from instruments and microphones – are converted into digital data via the interface’s on-board analogue to digital converter (A-D).
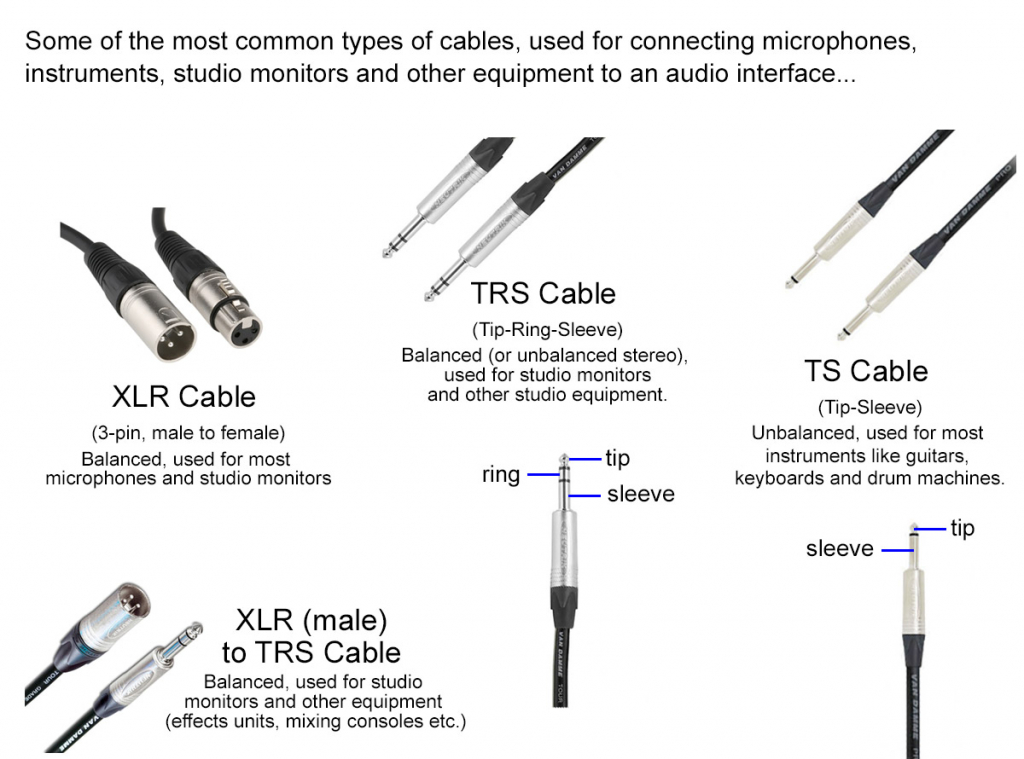
For analogue you’ll usually find standard cable connector types like XLR, TS and TRS, which are used for connecting microphones and instruments (as well as studio monitors).
At the same time, digital data is converted into analogue signals by the interface’s digital to analogue converter (D-A), which is sent to your speakers or headphones for playback.
Digital signals can also be received via the interface’s digital inputs – such as SPDIF, ADAT or MADI – or sent to other devices, via the interface’s digital outputs.
Many devices also feature MIDI connections, for sending and receiving MIDI data. Note that MIDI isn’t audio – it’s simply a method of sending control messages that remains popular in the audio world, allowing you to trigger the notes of MIDI instruments like synthesizers and drum machines, or use MIDI controllers and other MIDI-equipped devices in the studio.
Other connection types
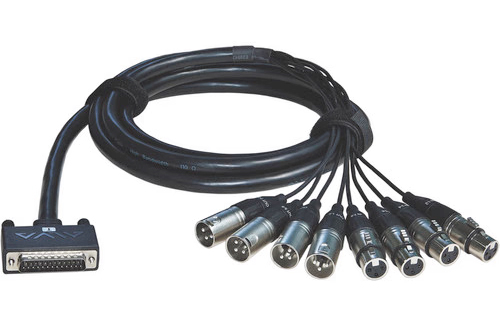
Some interfaces may also feature D-Sub connectors, which are just a way of fitting more channels into a smaller frame. To access these audio channels individually, analogue D-Sub connectors tend to require D-Sub breakout cables (sometimes called a ‘snake cable’), or a dedicated breakout box. Note that we’ve specifically said analogue here, as D-Sub connectors are also often used to break out additional digital audio channels as well.
In terms of digital connections, you’ll find interfaces can feature a variety of options, usually as a way of expanding the interface’s channel count.
From optical or coaxial connections for ADAT and SPDIF I/O; to digital XLR and D-Subs for AES-3; SC and LC connectors for MADI; ethernet connections for networking formats such as AES-67, Dante and AVB; as well as BNC connectors for Wordclock.
If all of this is starting to sound a bit too technical then don’t worry – just remember that audio interfaces can perform a number of different tasks, but the overall goal is pretty much the same – getting sound in and out of a computer, and on separate audio channels.
What is latency?
Latency is the time it takes for the sounds you record to be passed into your interface, through your computer and DAW, back to your interface again, and then back to your speakers or headphones.
With modern computers and interfaces, all of this is achieved in a few thousands of a second, known as milliseconds (ms). If the latency is too high, this can cause an audible delay whilst monitoring, which will make it difficult to keep timing when recording. (If you’ve ever heard your own voice echoing back whilst talking on the phone, you’ll have an idea of what it’s like to experience latency!)
It’s worth noting that latency is actually affected by a number of factors – how powerful your computer is, how much memory you have available, whether any background tasks are running, the size of your recording project, how many (and what type) of plugins you’re running etc.
If you’d like to test latency on your system, we recommend a free software application called RTL utility, which you can download from the Oblique Audio website.
There are two main ways to tackle problems with latency – one is to change the audio buffer size. The buffer size is the amount of processing your computer will apply to the audio processing, and is measured in samples – 32, 64, 128, 256 etc. A lower buffer size means lower latency, however this puts more strain on your computer’s processing, and can result in problems like the audio dropping out, as well as audible ‘pops’ and ‘clicks’.
The other way to deal with latency is to use direct monitoring, also sometimes known as ‘latency-free monitoring’, which involves monitoring directly from the interface (rather than via the computer). In the case of RME interfaces, you can use RME’s software controller TotalMix FX to route any of your incoming audio signals – such as microphones or guitars – straight to your headphones or speakers, allowing you to monitor the recording signal directly from the interface, and giving you essentially zero-latency.
Desktop or Rack-mounted?
Although it’s not an official categorisation as such, audio interfaces will usually fall into one of the following categories – desktop or rack-mounted.
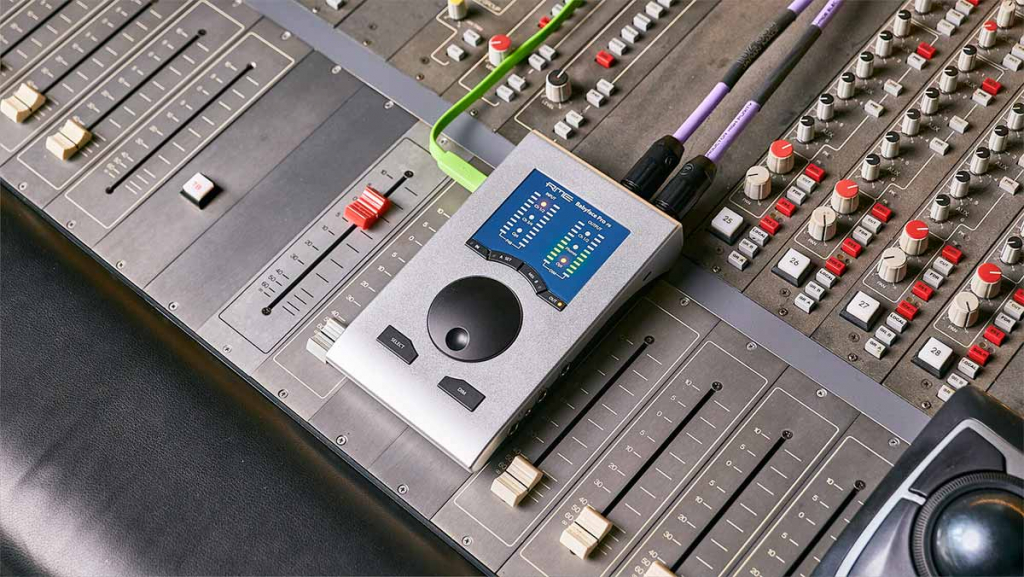
Desktop audio interfaces
As the name suggests, a desktop audio interface is designed to sit next to you on a desk, and may also be designed for mobile recording.
These devices are generally better suited for musicians or producers that only need to record one or two channels of audio at a time, or are doing most of their production solely within software such as a DAW (aka “in the box” production).
Other users include those who simply need a high quality monitoring and playback device, for tasks including audio mixing, editing and mastering, or working in video production.
Desktop interfaces also usually include a number of convenient controls on the front panel, such as headphone and volume controls, 48v phantom power (for powering condenser microphones), level metering, and shortcut keys for functions like input and output selection, checking the output in mono, or talkback (for communicating between a control room and a live room).
One final thing to note about desktop audio interfaces is that they may be bus-powerable – such as RME’s Babyface Pro FS – meaning they don’t require a dedicated power supply, and can run entirely from the power of a USB connection.
Rack-mounted Audio Interfaces
‘Rack-mounted’ or ‘rackmount’ audio interfaces tend to be designed for musicians and studios that require higher channel counts – for example, recording a full band or a drum kit, using a lot of outboard FX, or for recording with a traditional mixing console.
In comparison with a desktop interface, rack-mounted interfaces will often have a wider selection of analogue and digital I/O, allowing more instruments and microphones to be connected simultaneously.
Most rack-mounted devices will have some form of front panel controls, however a monitor controller may also be required, depending on where the interface is located in a studio.
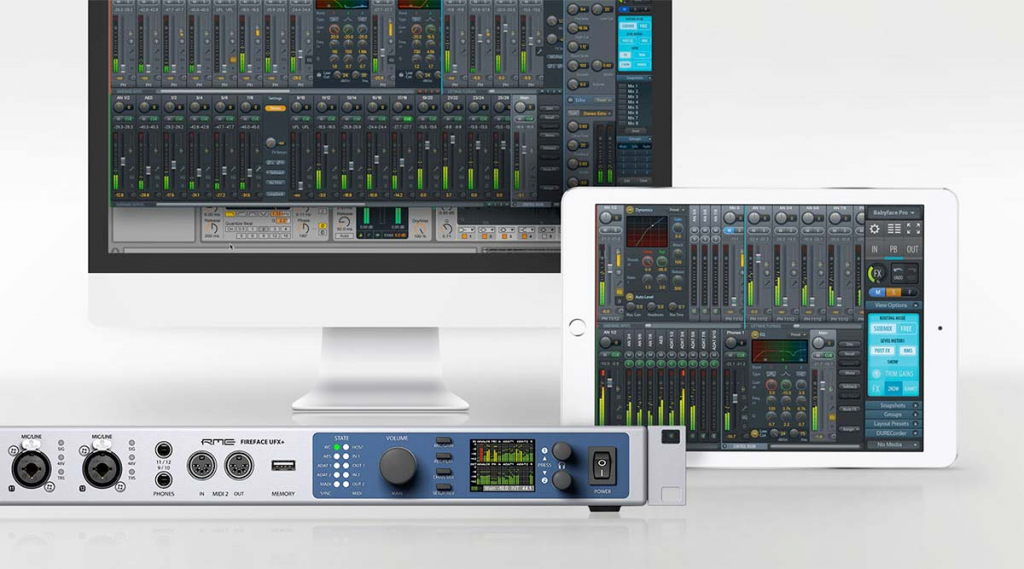
Some interface manufacturers also have dedicated remote controls available for their devices, such as RME’s ARC USB remote control, or RME’s free TotalMix Remote app, which allows for remote control from another Mac, PC or iPad via a network (including wirelessly over Wi-Fi).
RME currently offer three full 1U audio interfaces – the Fireface 802, Fireface UFX II, and the Fireface UFX+, which offer a number of different connectivity options and channel counts.
Audio Interface Examples
Below you’ll find a few different examples of the audio interfaces available from RME. We won’t be going into too much detail about each one here – see the full range for more information.
About RME Audio Interfaces
RME’s range covers a number of different audio formats and channel counts, starting with the compact 24-channel Babyface Pro FS, right up to the 188-channel Fireface UFX+, and the 394-channel MADIface XT and MADI FX PCIe card.
Note that these channel counts are usually made up of a combination of digital and analogue I/O, which is why the channel count is so high on such a small device.
RME also have a number of specialist interfaces for working with specific digital audio formats, such as Dante, AVB, MADI and ADAT, which we’ll look at in more detail in another article.
In terms of sound quality, all RME audio interfaces are designed with transparency in mind. We’d therefore recommend basing any purchasing decisions first and foremost on channel count, connectivity requirements and feature set, as the sound quality is consistently high across all RME devices.
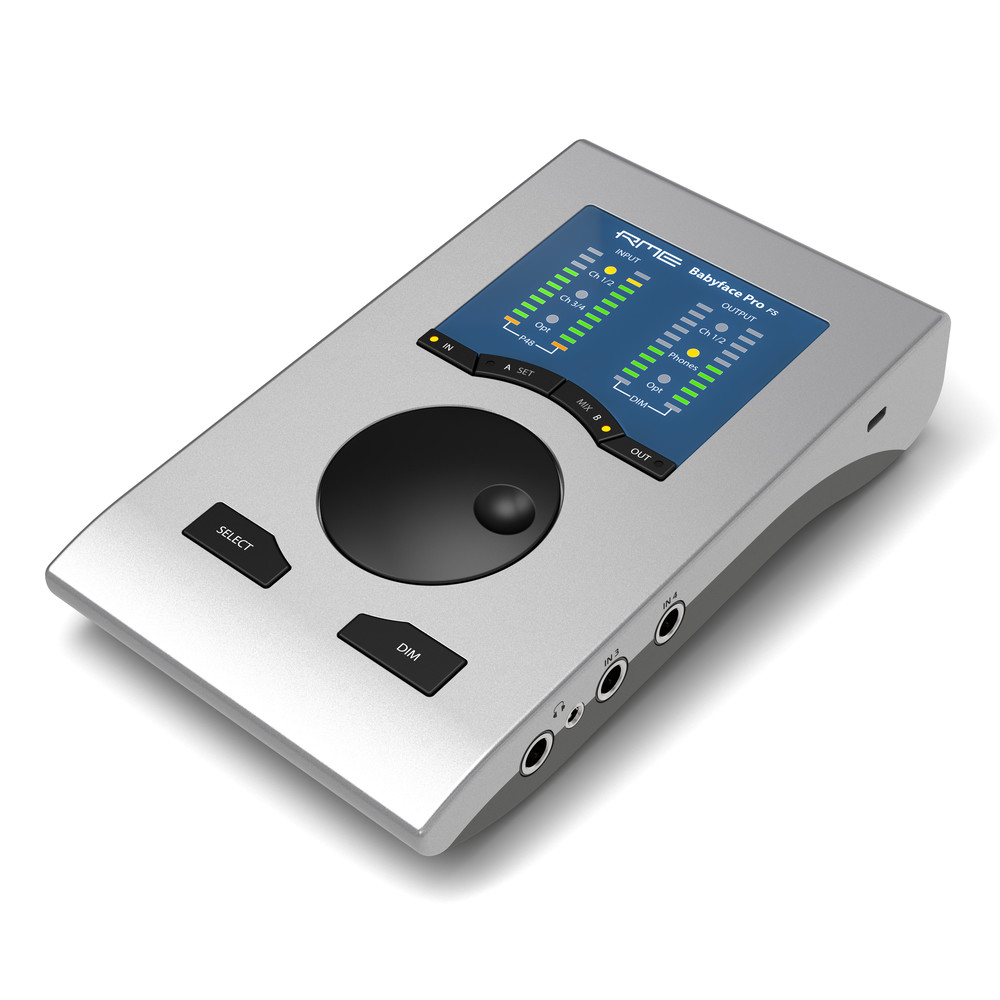
RME Babyface Pro FS
The RME Babyface Pro FS is RME’s desktop interface, and features everything you need for high quality recording and monitoring in a small, mobile footprint.
The two high-quality microphone preamps feature plenty of gain even via USB bus-power, with two unbalanced instrument / line-level inputs provided for additional recording. Studio monitors can be connected via the two XLR outputs, along with two pairs of headphones via the dedicated low- and high-impendence headphone outputs.
On the digital side, the USB connection allows for connecting with a Mac, PC or iPad (via an adapter), whilst ADAT I/O offers options for further expansion.
Built from a solid block of aluminium, the Babyface Pro FS embodies the RME philosophy in a compact, mobile design – crystal-clear AD and DA conversion, unlimited routing with TotalMix FX, and rock-solid reliability.
Find out more about the RME Babyface Pro FS
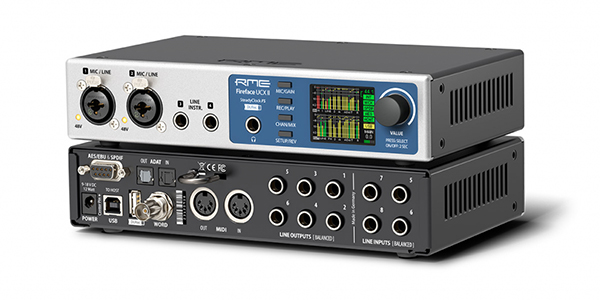
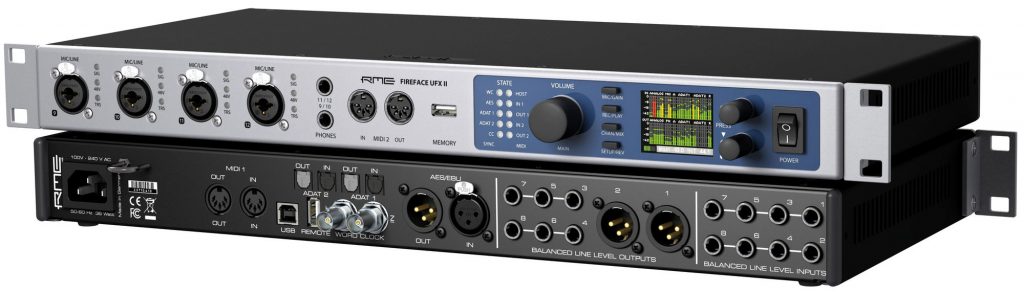
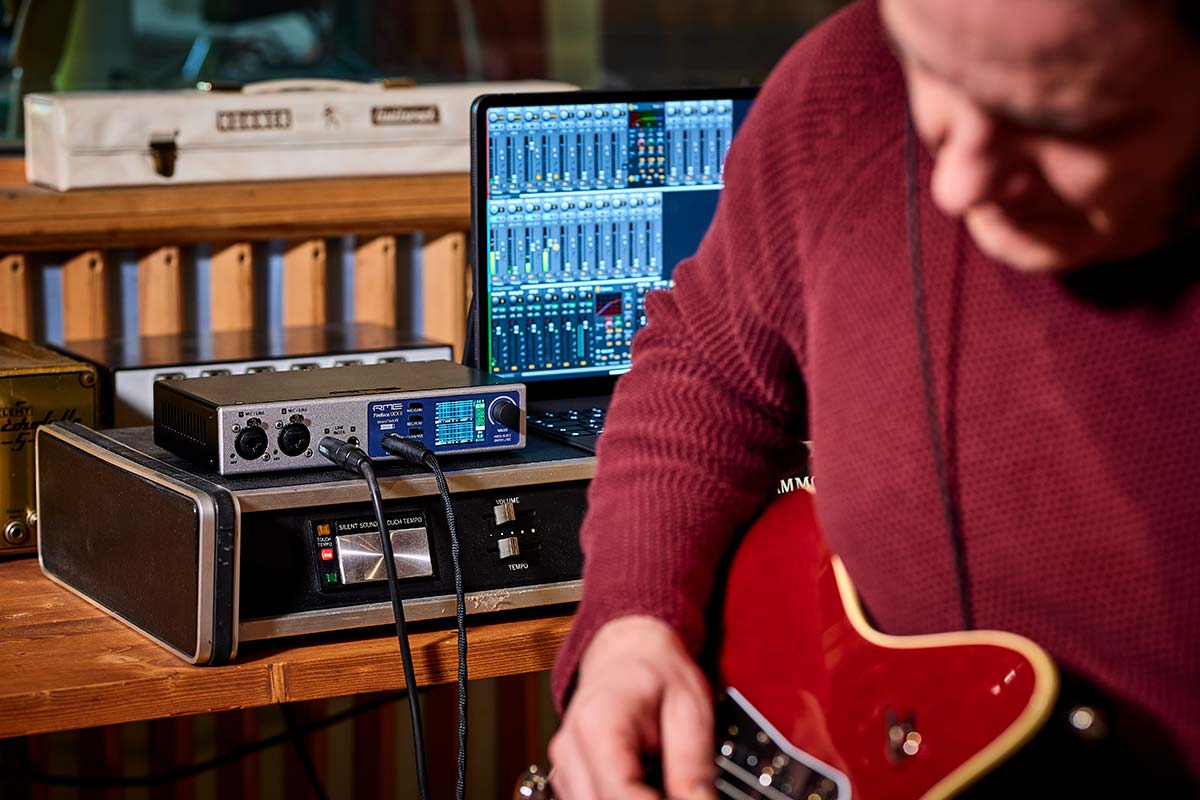
RME Fireface UCX II
The RME Fireface UCX II is RME’s latest interface, and is a 40-channel powerhouse in only 1/2U of rack-space.
The front panel features a pair of microphone preamps, with ‘combi’ input jacks that also accept balanced line-level signals, along with an additional pair of instrument (Hi-Z) / line-level inputs, plus a powerful headphone output.
The back panel houses more line level inputs, as well as a number of line-level outputs for connecting monitors, or for sending audio out to other devices. A number of digital connections are provided for expansion (SPDIF, ADAT and AES-3), alongside the USB connection for connecting with a Mac or PC.
Other features include full standalone recording with RME’s DURec (Direct to USB Recording); SteadyClock FS digital clocking technology; and a direct connection for the ARC USB remote.
Find out more about the RME Fireface UCX II
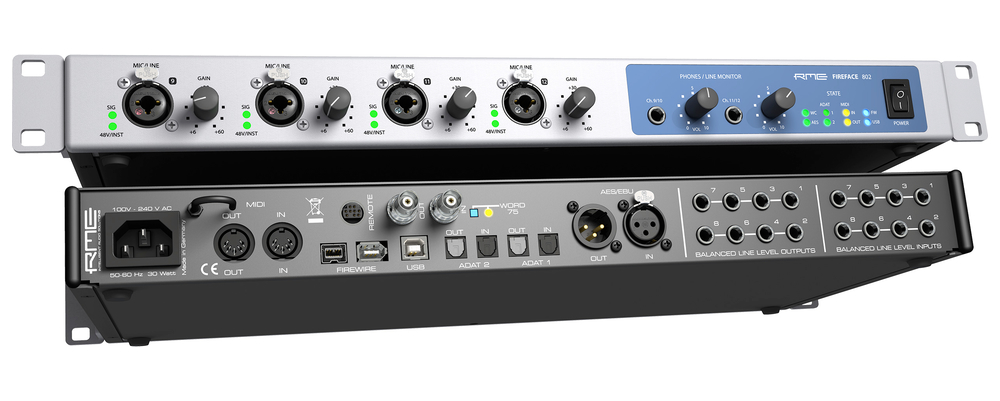
RME Fireface 802
Next up, we’ve got the RME Fireface 802, which is double the width of the UCX II, and is designed to be rack-mounted in a 19” rack – a standard size called 1U or 1RU.
The Fireface 802 is the successor to the original RME Fireface 800, an extremely popular audio interface in its day, and one which can actually still be found powering many studios and live rigs around the world – a testament to the longevity of RME devices!
The input and output options are similar to the UCX II – four combi XLR inputs on the front, which again can also accept TRS and TS cables, and can be used for recording microphones, instruments and line-level devices, plus two headphone outputs.
On the back we again have a range of line level analogue I/O, as well as dual ADAT I/O ports, and a USB connection again. You’ll also notice that this particular interface also has the Firewire connections mentioned above – again, this is just an alternative method of connecting to a Mac or PC, although Firewire has for most part been phased out in modern computing.
Note: If you’re using Firewire, one thing to be aware of is that it’s not guaranteed to be ‘hot-pluggable’ or ‘hot-swappable’! This means that unlike with USB, you need to make sure the device is switched off before you connect or disconnect the firewire cable.
Whilst the IEEE 1394 standard (official name for Firewire) required firewire devices be hot-swappable, in our experience this isn’t always guaranteed – we’ve seen enough dodgy cables and cheap firewire cards fry the Firewire chip of a Fireface 400 or 800 over the years… Unless you fancy filling your studio with smoke, we’d highly advise against it!
Find out more about the RME Fireface 802

RME Digiface USB and Digiface AVB
Finally let’s take a quick look at two slightly different audio interfaces – the RME Digiface USB and the RME Digiface AVB.
Despite the difference in look and size to the other interfaces above, they’re both doing the same job of allowing audio to be passed to and from a computer, only in this case using specific digital audio formats (ADAT and AVB respectively, which we’ll be taking a deeper look at later in this series).
In the case of the Digiface USB, this is a dedicated ADAT interface, meaning it’s simply designed for connecting other ADAT-equipped gear in the studio. The idea here is that you can add other external devices of your choosing – such as standalone AD/DA converters and microphone preamps – with the Digiface providing a means of sending and receiving audio channels from those devices, to and from your computer via its USB connection.
And the same goes for the RME Digiface AVB, which as the name suggests, is designed to get audio in and out of a computer as part of an AVB network. We won’t be discussing AVB in any detail here, but essentially it’s another method of transferring digital audio, only in this case via a computer network, and using standard ethernet cabling such as Cat6 or Cat5e.
Find out more about the RME Digiface USB
Find out more about the RME Digiface AVB
Choosing the right audio interface
Despite the many differences in size and I/O, all audio interfaces have the same purpose at their core: getting sound in and out of a computer.
Choosing the right interface for your recording setup depends on a number of factors, but the main questions to ask yourself are:
• How many channels do I need?
• What connection types do I require (analogue and digital)?
• Do I plan to add other recording studio equipment at a later date?
• Do I need any other features – such as monitor controls, routing flexibility, or standalone operation? And do I want superb low-latency performance, regular updates and long-term support, not mention the most stable custom-written audio drivers in the business…? (All of which RME interfaces provide of course!)
We hope you enjoyed this introduction to audio interfaces, the first part in our new ‘Synthax Explains’ series!
For more information on expanding your audio interface, check out our article ‘How to Add More Inputs and Outputs to Your Audio Interface’.
Equally if you’d like to know more about any of the audio interfaces available from RME, give us a call on 01727 821 870 to speak to one of our team, or drop us a message via our contact us page. We also offer a free extended 5 year warranty on all RME audio interfaces, when purchased via any of our authorised UK dealers!